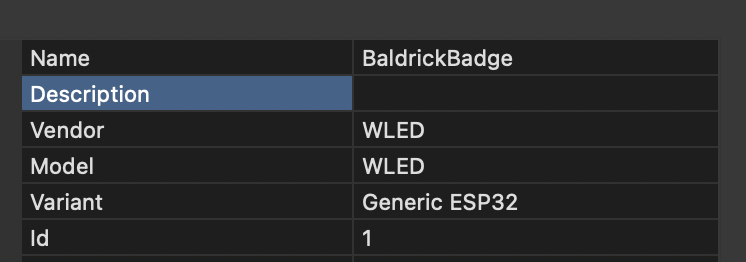
BaldrickBadge
Getting Started with BaldrickBadge
Setup and configuration guide for your wearable badge
Getting Started with BaldrickBadge
Step 1: Badge Setup
Wireless Network Setup
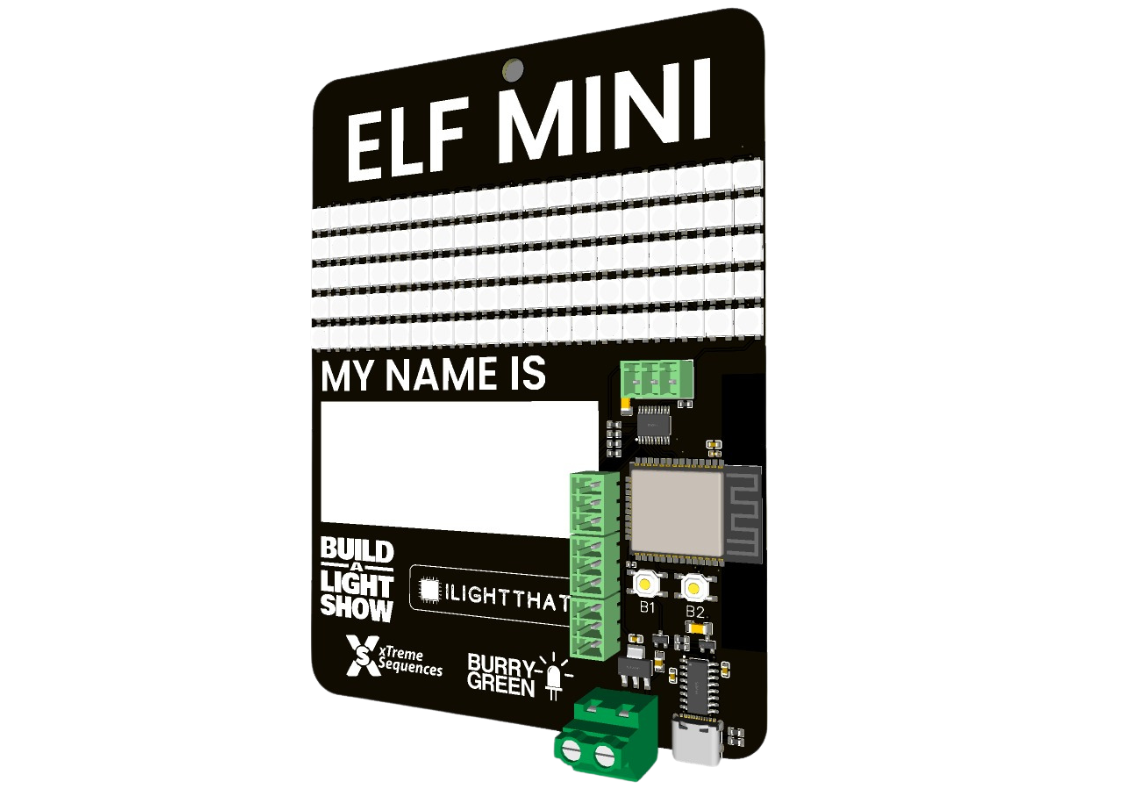
When your badge is plugged into a power supply, it will create a wireless network which starts with baldrickbadge- followed by an alphanumeric code on the back of it which matches the one on the sticker on the back of your badge.
Network Password: hotplates
Event Tip: For events, we would recommend you do not join the WiFi network as that would give everyone else access to your badge... and we wouldn't want people putting rude messages on them would we?
Step 2: Using the Matrix
Matrix Display Mode
You can use your badge as a matrix display. As I'm writing this I cannot remember how to do it but I know it works...
The onboard matrix is 95 x 5 pixels.
Step 3: Syncing Multiple Badges
ESP-NOW Synchronization
WLED has the ability to use ESP-NOW to synchronize the badge effects between them.
If you'd have bought the badges we would have done a really detailed instruction on how to set this up but you didn't so we didn't.
Figure it out, it will be great!
Step 4: xLights Connection
Connecting with xLights
You can connect the badge to xLights and use it as a controller. xLights discover won't work, but if you get the IP address of it, you can use the following settings.
Port Configuration
- Port 1 - Should be the onboard pixels
- Port 2 - Should be the one built in
- Ports 3, 4 and 5 - Should be the additional ones if you have the upgrade kit
Step 5: Button Configuration
Onboard Buttons
We've added two buttons to the board for you to use. We've not quite worked out how to program them in the interface, but these are the default responses.
Button One
- Short press: Turns LEDs on/off
- Long press: Changes the palette colour (randomly?)
Button Two
- Short press: Cycles through effects (randomly?)
- Long press: Adjusts the brightness (up one press, down the next)
Future Update: Button programming interface coming soon!