
BaldrickDMX Manual
Last updated 25 Jul 2026
Getting started
You’ve just got your board through the post and you are really excited about getting started! WE KNOW, We’ve been there. These easy to follow steps will get you started in minutes!
Always ensure your power supply is disconnected before making any connections. Double-check all wiring before powering on.
Step 1: Plugging in Your Controller
Always Use a Power Supply
Never, ever EVER EVER plug your controller directly into the wall outlet, it will go bang and you’ll have to buy another one and explain to your partner what that burn mark on the kitchen table is. The BaldrickDMX has a barrel jack connection and a 2 port phoenix connector, these can handle voltage from 5v to 24v, which should make it easier to match whatever you are plugging in. For technical users - barrel connector (centre positive) and we use 5.5x2.1mm barrel jacks. Please remember you are just powering the board not the devices so we don’t need a tonne of amps. You’ll notice that a British plug has three wires and our power jacks inputs only have two - that’s because you need to put a power supply in between them. We recommend the use of a .
Step 2: Installing the Firmware
Initial Firmware Setup
When your controller arrives it will be in a ‘sleeping state’ - you just need to plug it into your network and head to http://baldrickdmx.local (if your DNS doesn’t accept that then just look for it on your network).
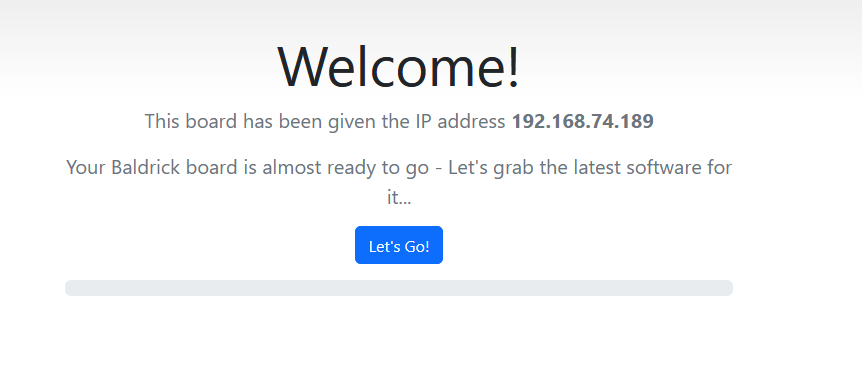
How to Install
To put it simply, press the button that says Lets Go then go and have a brew, the controller will connect to our server, download the latest firmware and automatically install it, once it’s done the page will refresh and you can start connecting fixtures.
You must plug the board directly into your network for the initial firmware download (or make sure your computer can give it an IP address and internet access).
How Do I Update After That?
When you go to the Web interface and look at the stats section, you’ll see the version number, if there is a new version, you can click that and it will automatically update in a similar interface to how this initial install works.
Step 3: Connecting Fixtures
It’s Time to Connect the Fixtures
It’s time to connect the fixture, choose a port:
- RJ45
- 3 PIN XLR
- 5 PIN XLR
Then take your cable and plug it in. Please don’t make me have to record a video on how to do this.
They all do the same thing so don’t get too excited.
Step 4: xLights Connection
Connecting with xLights
You can connect directly with xLights, look for BaldrickDMX under ilightthat.
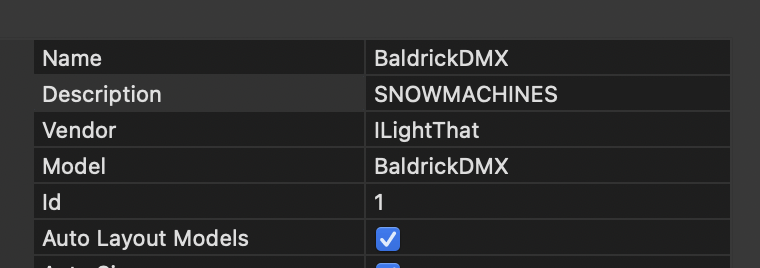
From here you can push your model settings directly to the controller and output to lights nice and easily!
You can either:
- Click Discover and xLights will automagically find the BaldrickDMX.
- Add the board manually by selecting ILightThat as a vendor and BaldrickDMX as the Model. You will then need to put the IP Address in manually.
Technical specifications
At a glance
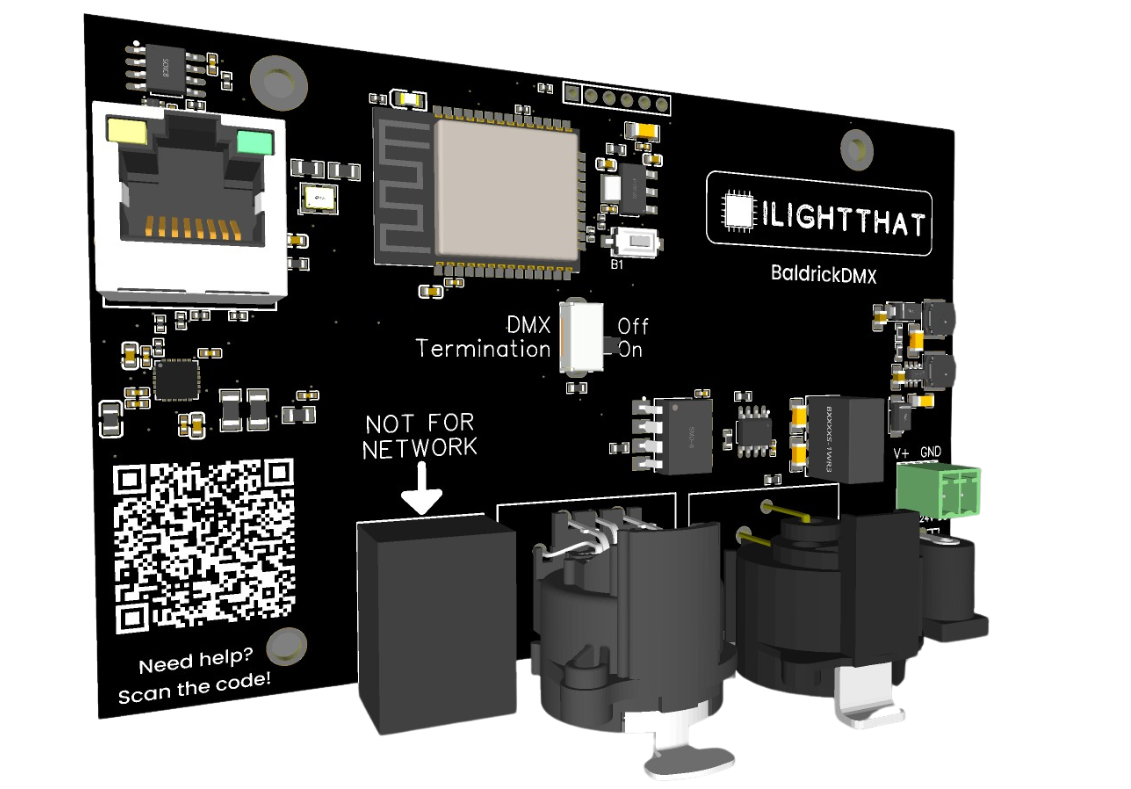
Board components
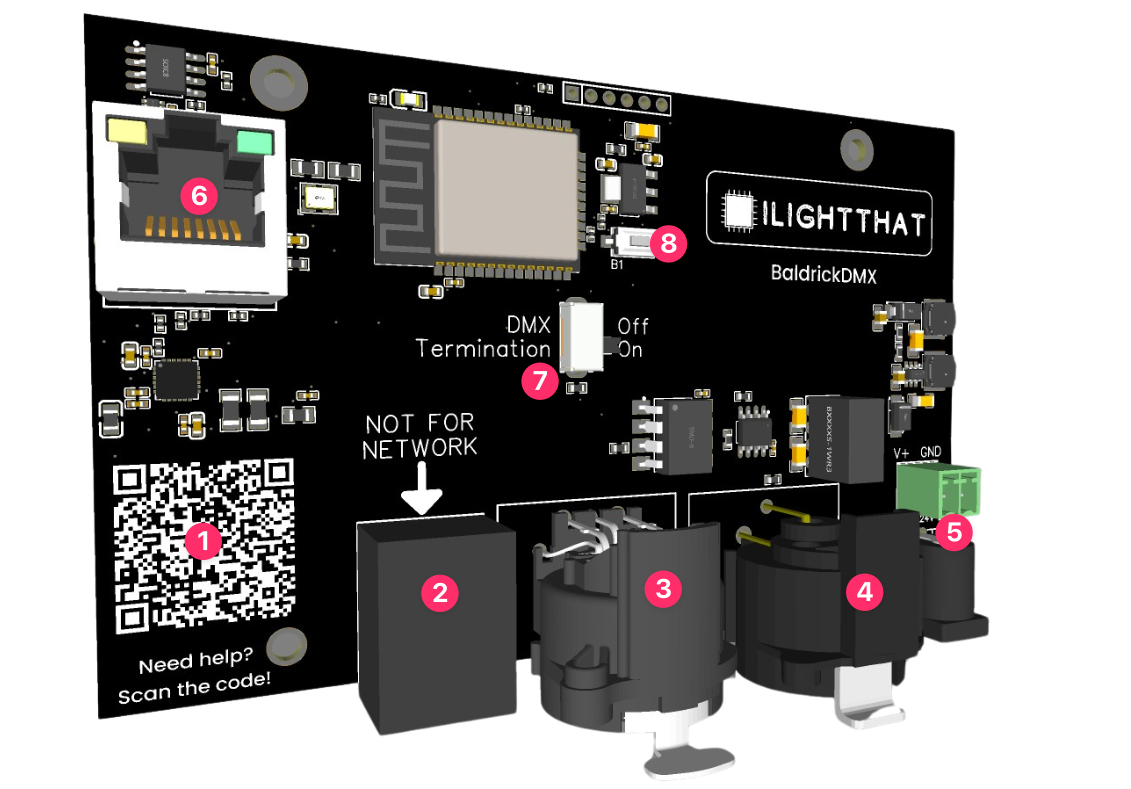
- QR Code — An easy to scan QR code which will take you to these docs for easy troubleshooting.
- DMX OUTPUT RJ45 — With a helpful reminder NOT TO PLUG THIS PORT ON YOUR NETWORK.
- DMX OUTPUT 3 PIN — A fancy schmancy Neutrik XLR.
- DMX OUTPUT 5 PIN — A fancy schmancy Neutrik XLR.
- Power input — You’ve got the choice of a Phoenix connector or barrel jack (DO NOT USE BOTH), these can take 5v to 24v (or up to 48v on version 1.1) and will automatically step down to power the components, no jumpers needed.
- Ethernet port — Plug this into your show network.
- DMX Termination switch — DMX cables need to have their ends properly terminated to prevent any issues with the signal. Sometimes, the cable plugs have this built-in, but if they don’t, this switch lets you do it right there. (On some boards this switch may be hard to shift due to the coating process, a quick push with a flat head screwdriver should move it easily, we’ve learned from this and will be revising this button placement in the next revision.)
- Button — The BaldrickDMX comes with a button on the board for factory reset functionality. This button is in case you break the board and need to reset it to factory settings. When held for 5 seconds during the board boot process, the controller will reset to factory settings, everything will be removed including the latest firmware and it will be in the ‘shipping state’ where you click to update to the latest firmware.
We’ve designed the BaldrickDMX to not only be as compact as possible, we’ve matched the mounting holes to other Baldrick boards so mounts can be reused. DO NOT DRILL out these holes to make them fit the screws you’ve got already, doing this will void any warranty.
Web interface
The BaldrickDMX includes a powerful web-based configuration interface that allows you to set up and control your board from any web browser. This comprehensive guide covers every aspect of the web interface.
Stats Dashboard
System Information
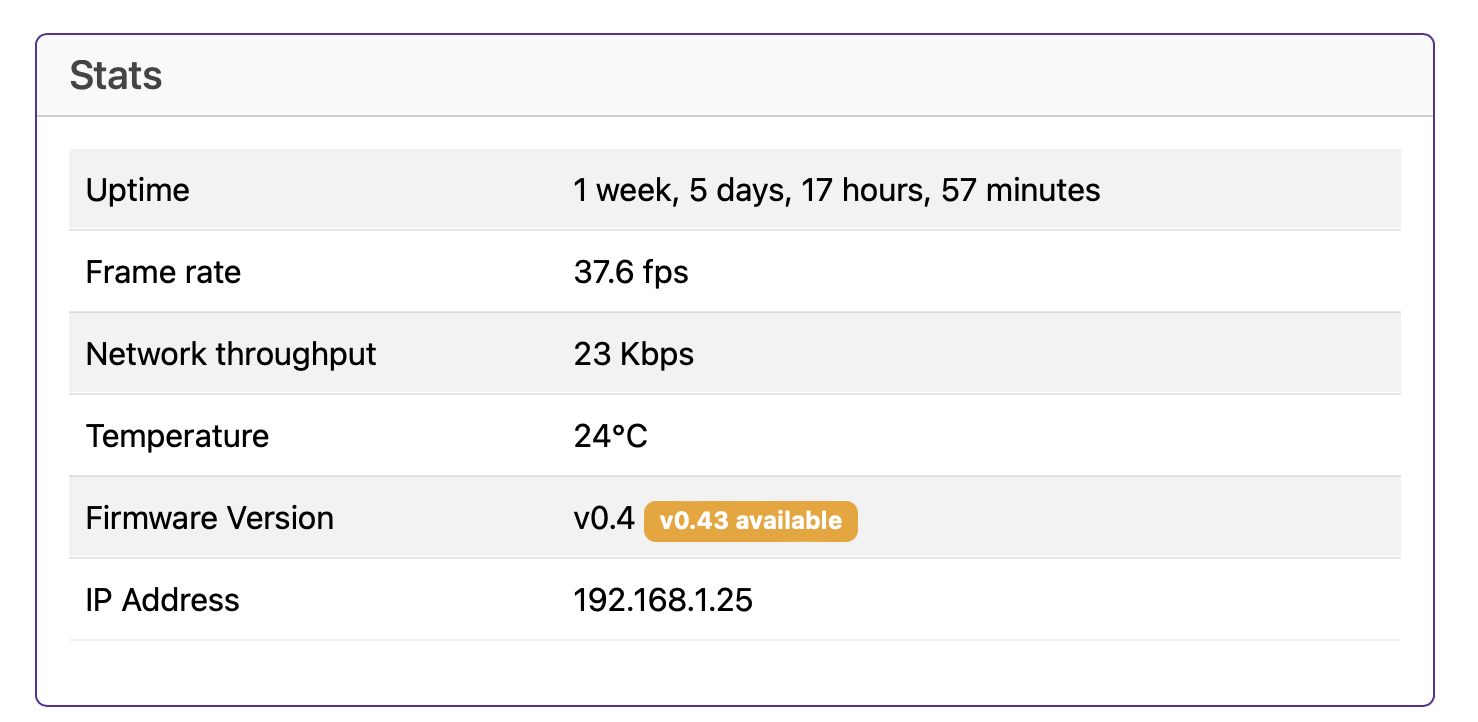
The Stats board gives you a heads up as to what’s going on with your controller.
Uptime
Tells you how long your controller has been powered on (this is useful in June to remind you that you forgot to turn it off over christmas)
Frame Rate
This lets you know what the FPS (Frames Per Second) the controller is currently outputting.
Network Throughput
Like the FPS, this gives you an indication of the volume of network traffic passing through the controller, this should help with debugging.
Temperature
With a sensor next to the Ethernet connector, this gives you an indication of the board temperature (in Celsius because water freezes at 0, not 32.. how does that make sense?)
Generally, PCBs and components are good for -40 to +85°C. Anything below 60°C on this board is fine and nothing to worry about. If the temp is above that, try blowing on it like you would a hot chip out of the oven.
Firmware Version
The BaldrickDMX is pretty new in the world of controllers and we’ve got a LOT of features left to add, this will let you know your current version and if there is a version to upgrade to.
(clicking the new version will upgrade it in place then restart the controller)
IP Address
It would be pretty silly to have a controller information box without showing you the IP Address of the controller wouldn’t it? That would be like launching a controller without being able to manage the networking.
Test Mode
Quick Testing & Troubleshooting
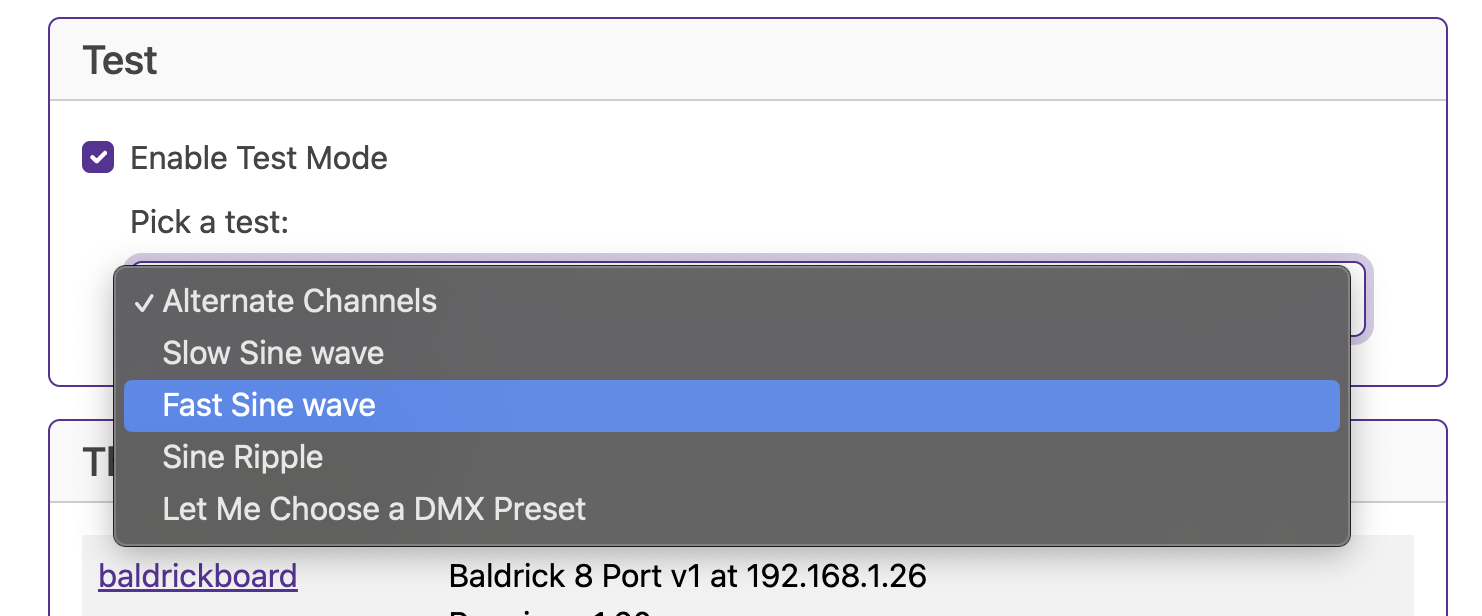
Test Mode allows you to, well, test the board.
Test Patterns
Alternate Channels
Alternates between channels for testing individual DMX outputs.
Slow Sine Wave
All channels start at zero, go to 255, and back to zero in a slow sine wave pattern.
Fast Sine Wave
Same as slow sine wave but at a faster speed for more dynamic testing.
Sine Ripple
Creates a sine wave that moves across channels over time, each channel moving between 0 and 255.
DMX Preset
Allows you to select a DMX preset that you’ve created as a test mode.
Networking Configuration
Good Defaults, Easy Config
Hostname
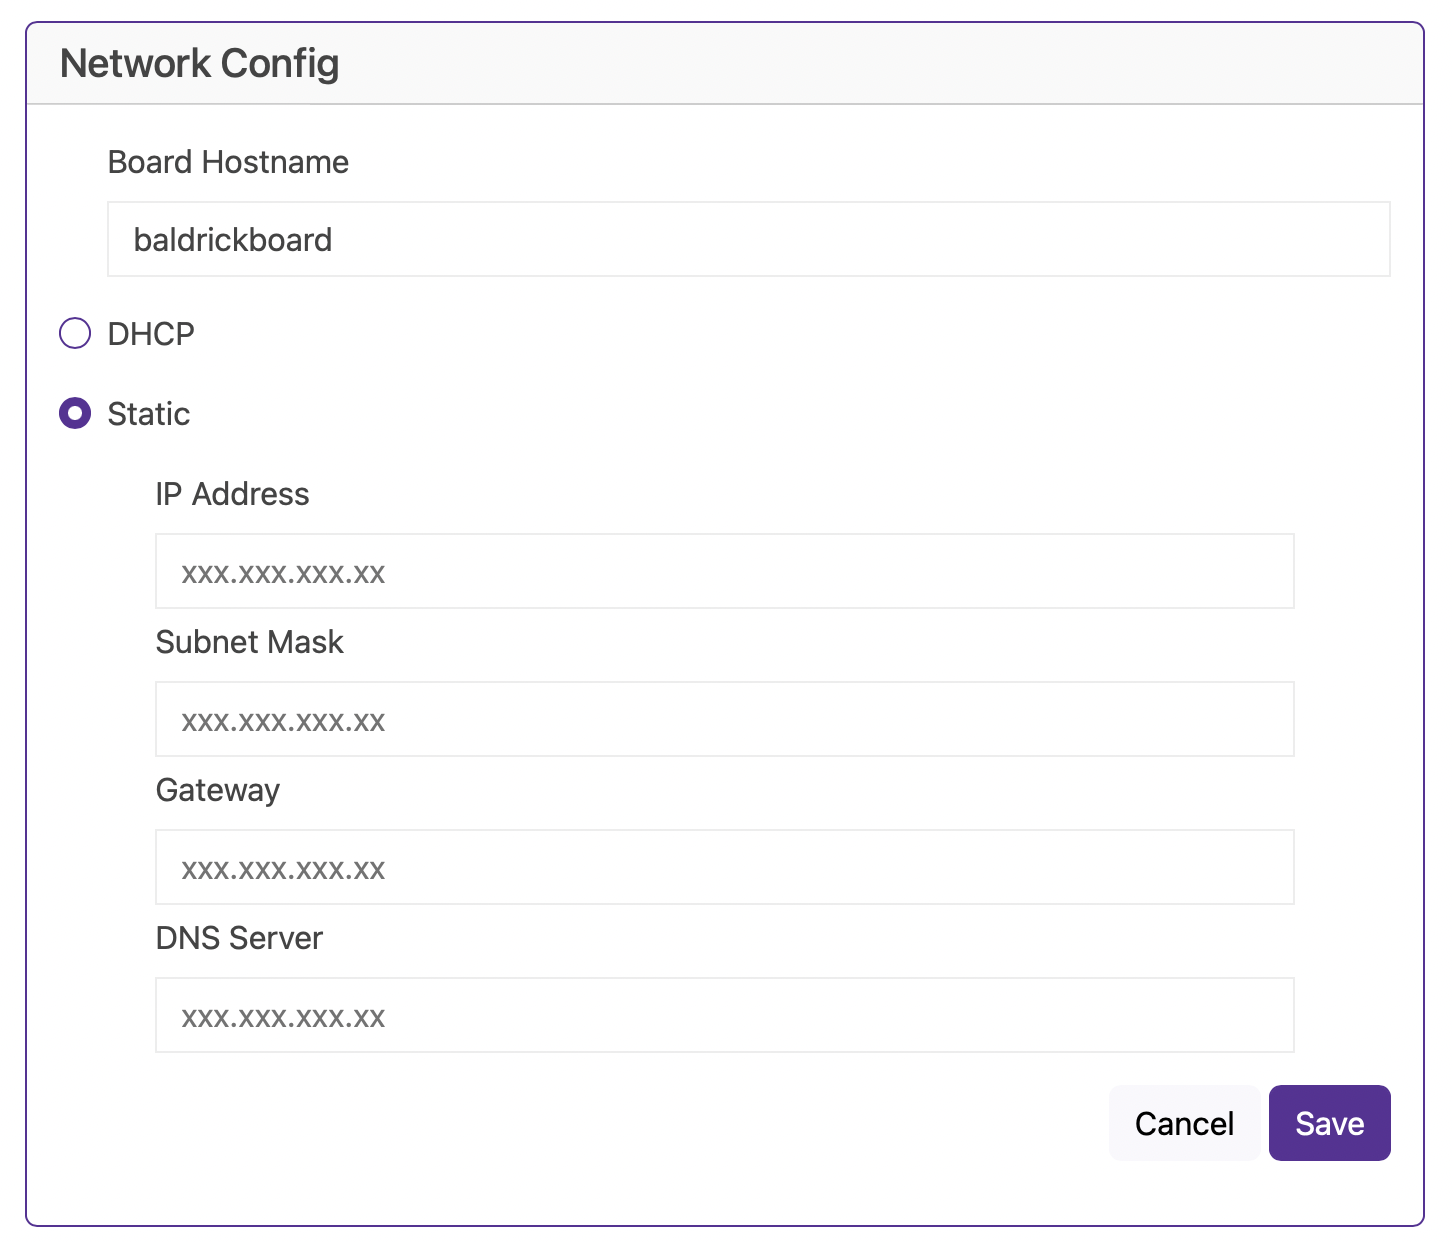
The default hostname is baldrickdmx (hence baldrickdmx.local). If you have one BaldrickDMX then it’s completely fine to keep this as it is, however if like us you want to collect a few of them, then we’d recommend you change this to something like frontgarden or upstairsroof
(Just a reminder that hostnames should be lowercase without spaces)
DHCP / STATIC
The default option is DHCP (which is Dynamic Host Configuration Protocol but you don’t need to know that) which basically means your router or computer gives the board an I.P. address. This is great for initial setup but when you want to run a show it’s best to switch it to STATIC, that’s where your controller tells the router / computer “This is my IP”.
IP Address
Set this to the IP address that you want the controller to be fixed to.
Subnet Mask & Gateway
It is more than likely that you can copy the Subnet Mask (the size of your network) and the Default Gateway (the exit point of your network) from the output of an IPconfig check.
DNS Server
DNS wise, typically, your default gateway is your router IP, and that more often than not, can provide your network with DNS. However, some people like to use “outside 3rd parties” DNS like google or cloudflares DNS. If you don’t know about this, its probably best just to stick to DHCP.
DMX Presets
Preset Management
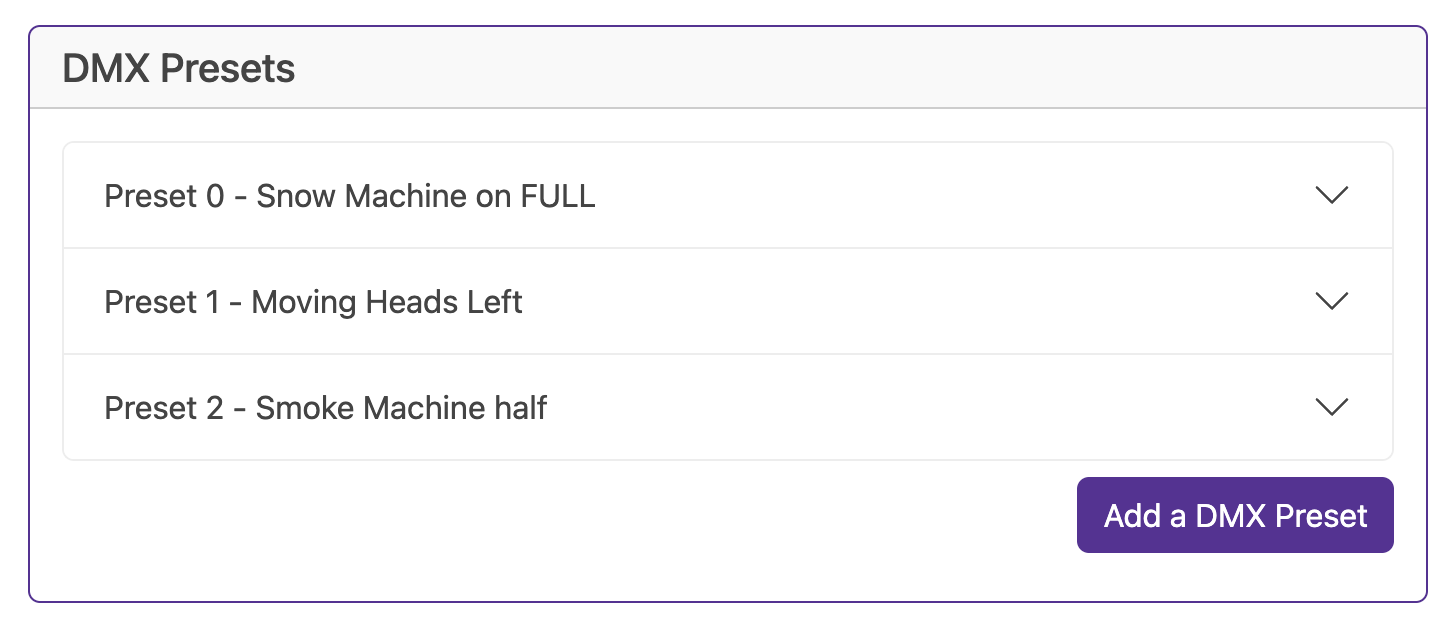
The BaldrickDMX lets you define Presets of set channels and values that can be used either in a test mode or via an action over the Turnip Network.
Adding a Preset
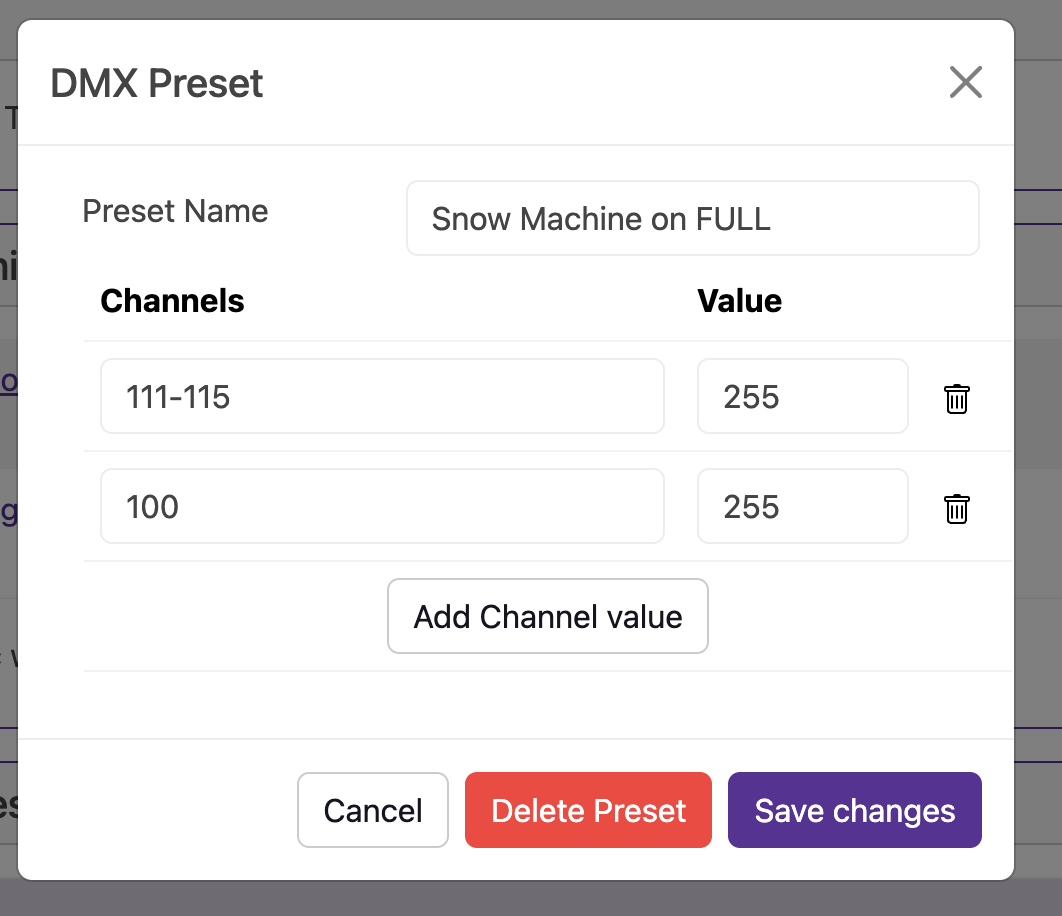
When you add a preset, you are asked for the channels and a value, you can add as many channels and values as you like.
The channels input takes comma separated values such as 11,16,19,21 but also can take ranges such as 100-150 this will include all the numbers between 100 and 150 (including 100 and 150).
Mark Mode
Coming soon…
The Turnip Network
Network Discovery
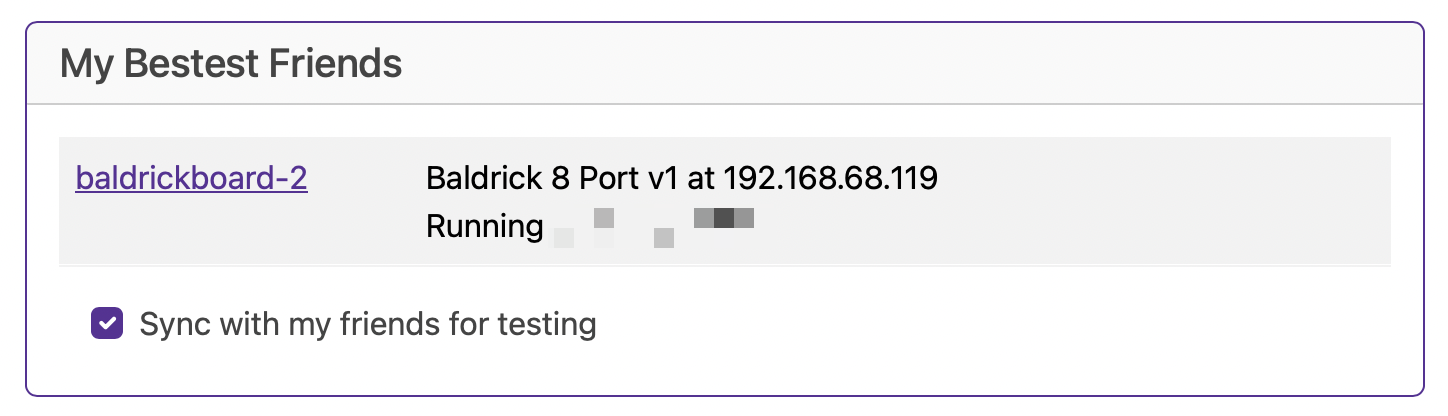
The BaldrickDMX will keep an eye out on the network for other Baldricks and let you know how they are doing (this is helpful as we don’t put an LCD screen on the board).
Test Sync
Ticking this box will sync the test mode between all compatible boards, meaning if you are doing something on the house and want all your baldricks in Test Mode, it’s very easy to do!
Data Settings
Protocol Configuration
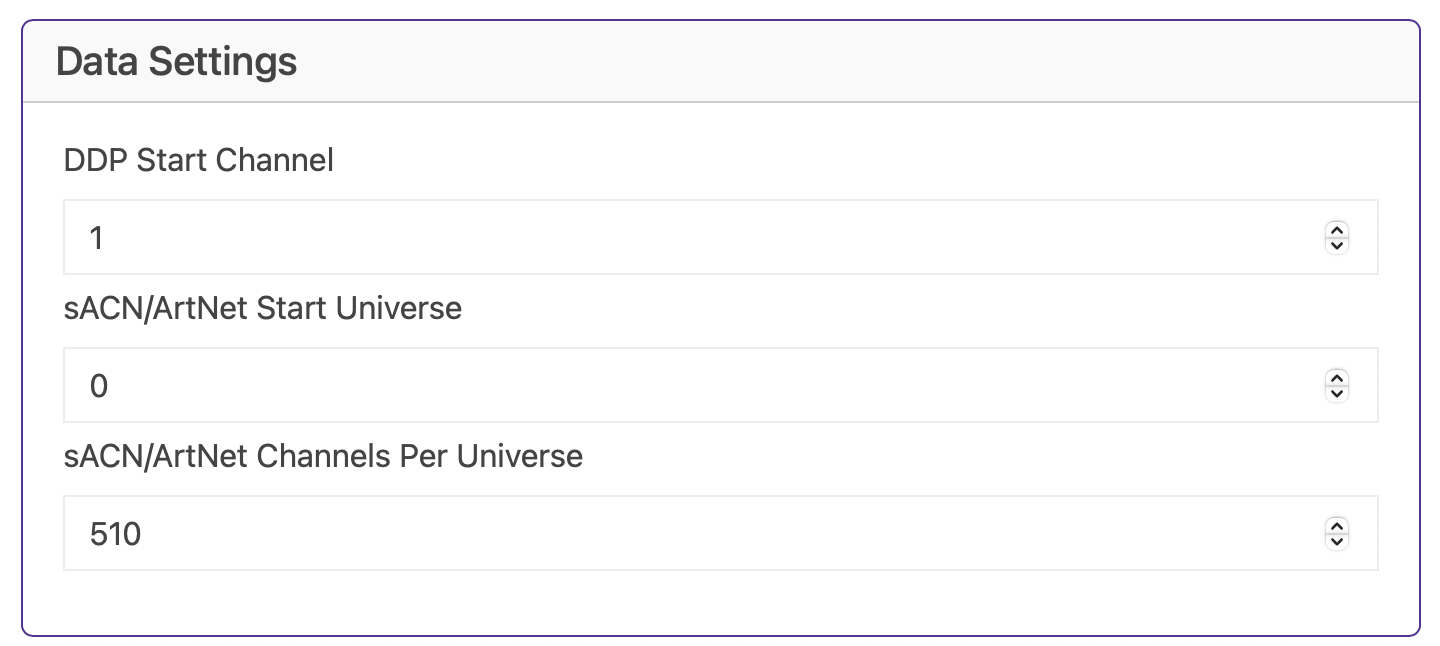
DDP Start Channel
Configure the starting channel for DDP (Distributed Display Protocol) communication.
sACN/ArtNet Start Universe
Set the starting universe for sACN (Streaming ACN) and ArtNet protocols.
sACN/ArtNet Channels Per Universe
Configure how many channels are used per universe for sACN and ArtNet protocols.
Advanced Settings
Advanced Configuration Options
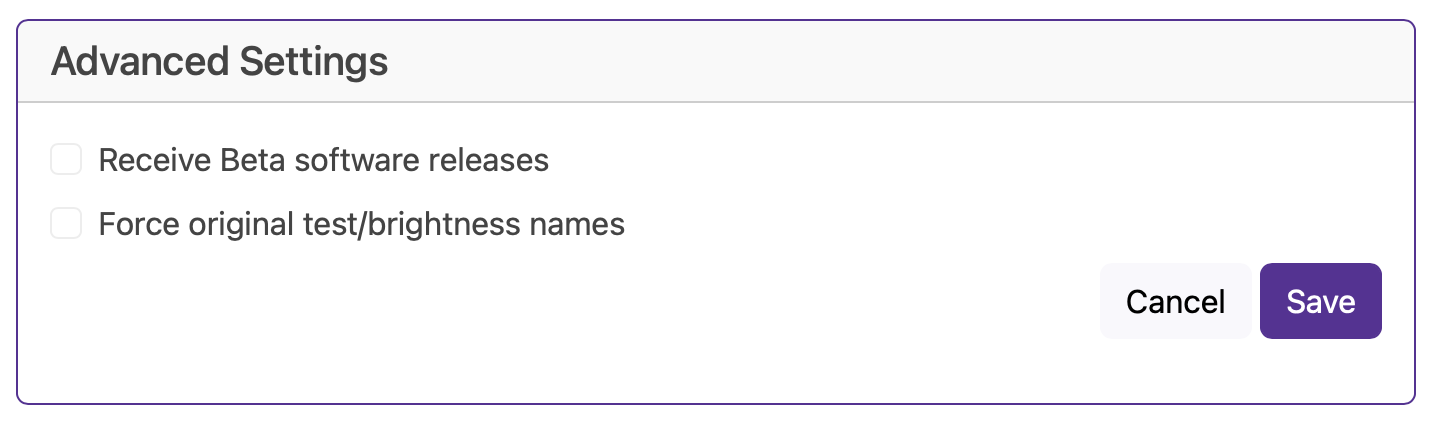
We avoided it for so long but it’s finally time to have a “box to stick stuff that doesn’t fit in the other categories” and here it is, Advanced Settings.
Launch Preset at Boot
This allows you to select a preset to be loaded by default when the board is loaded, if a signal is detected from the network then this preset is overridden.