Baldrick8
Getting Started with Baldrick8
Complete setup guide from power to pixels
Getting Started with Baldrick8
Welcome to your new Baldrick8! This comprehensive guide will walk you through everything you need to know to get your board up and running, from plugging in power to creating your first light show.
Safety First: Always ensure your power supply is disconnected before making any connections. Double-check all wiring before powering on.
Step 1: Plugging in Your Controller
Always Use a Power Supply
WARNING: Never, ever EVER EVER plug your controller directly into the wall outlet, it will go bang and you'll have to buy another one and explain to your partner what that burn mark on the kitchen table is.
You'll notice that a British plug has three wires and our power jack inputs only have two - that's because you need to put a power supply in between them.
We recommend the use of Meanwell Power Supplies.
The Power Supply Explained

- Live - The live wire carries electricity from the power source to appliances or circuits, supplying the energy needed for operation. On a British plug this is generally BROWN.
- Neutral - This carries the electricity back to the power source. On a British plug this is generally BLUE.
- Earth - This grounds electrical systems, redirecting excess current safely into the ground to prevent shocks and fires. On a British plug this is generally GREEN / YELLOW.
- +V - The positive voltage output of the power supply, typically you'd attach a RED cable to this.
- -V - The negative voltage output of a power supply, typically you'd attach a BLACK cable to this.
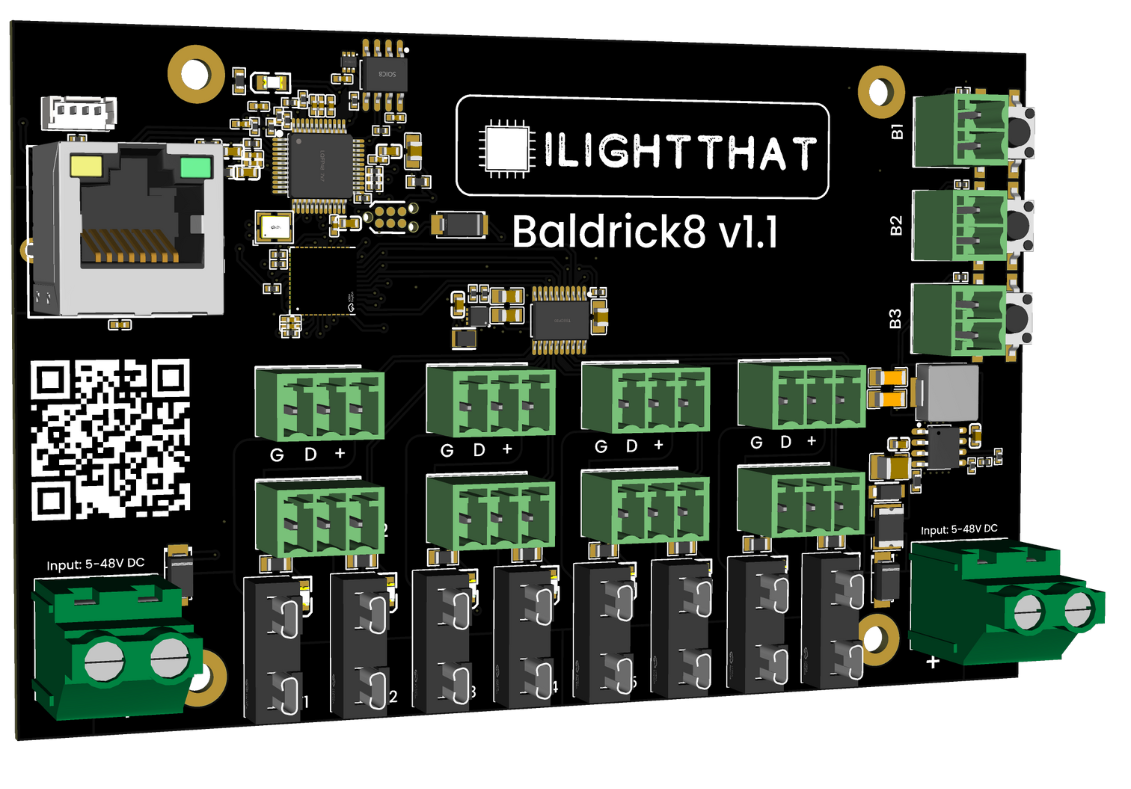
Powering the Board
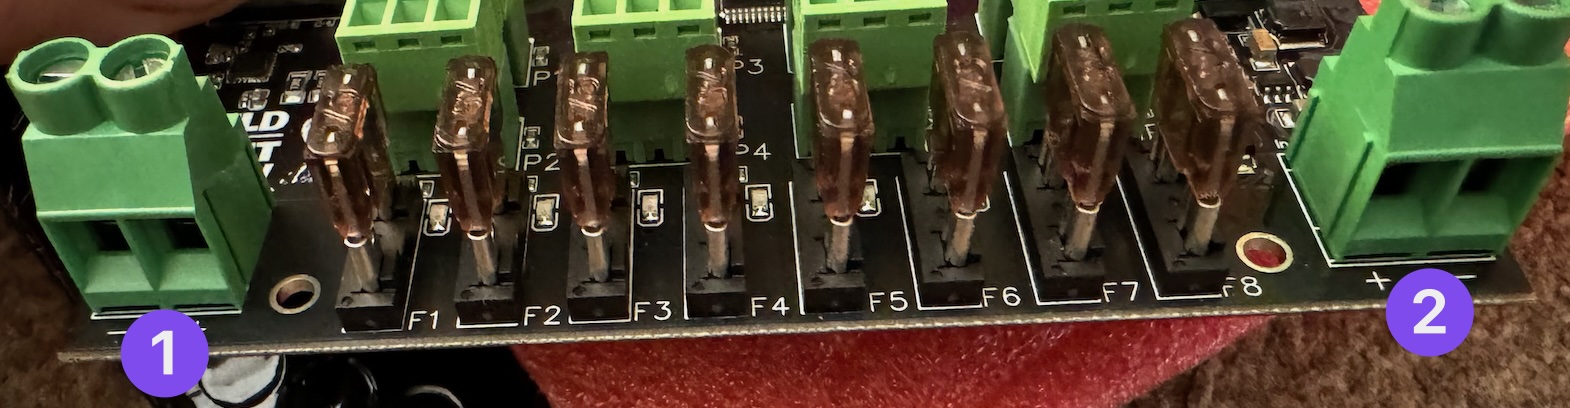
- Port 1 will power pixel ports 1 - 4
- Port 2 will power pixel ports 5 - 8
- Either port will automatically power the board, you do not need to configure this
- Both ports will handle between 5v to 24v and can be different voltages
Important: As with all power connectors, please check for stray strands BEFORE turning on your controller, those aren't the flashing lights we want to create.
What Cable Do I Use?
The thicker the cable the better (within limits), DO NOT use the wire your wall plug came with to link your power supply to your controller.
It is almost certainly not thick enough to handle the amps.
We recommend 10AWG cable wire at a minimum but please do further research for your requirements.
Step 2: Installing the Firmware
Initial Firmware Setup
When your controller arrives it will be in a 'sleeping state' - you just need to plug it into your network and head to http://baldrickboard.local (if your DNS doesn't accept that then just look for it on your network).
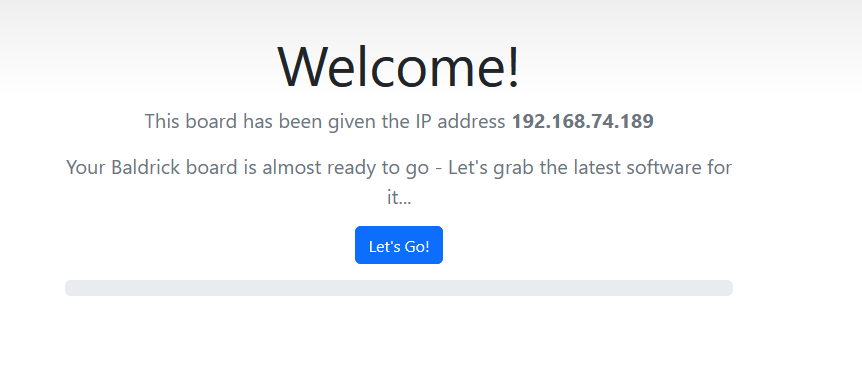
How to Install
To put it simply, press the button that says "Lets Go" then go and have a brew, the controller will connect to our server, download the latest firmware and automatically install it, once it's done the page will refresh and you can start connecting pixels.
Tip: You must plug the board directly into your network for the initial firmware download (or make sure your computer can give it an IP address and internet access).
How Do I Update After That?
When you go to the Web interface and look at the stats section, you'll see the version number, if there is a new version, you can click that and it will automatically update in a similar interface to how this initial install works.
Step 3: Connecting Pixels
It's Time to Connect the Lights
To Pigtail or Not to Pigtail
We recommend adding pigtails to your controller rather than pixels directly.
Your controller will come with 3 port Phoenix connectors.
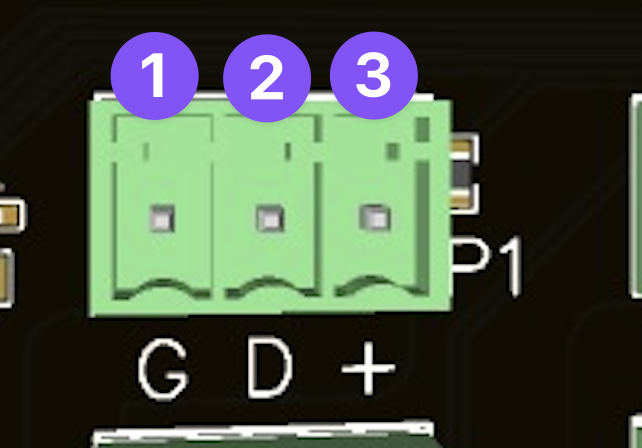
The Phoenix Connector Explained
- GROUND - The negative wire of your pixels (this is BLACK)
- DATA - The data in wire of your pixels (this is YELLOW)
- LIVE - The positive wire of your pixels (this is RED)
Note: The colour suggestions are for BALS pixels, if you are buying from somebody else... then ask them.
Step 4: xLights Connection
Connecting with xLights
You can connect directly with xLights, look for Baldrick Controller under ilightthat.
From here you can push your model settings directly to the controller and output to lights nice and easily!
You can either:
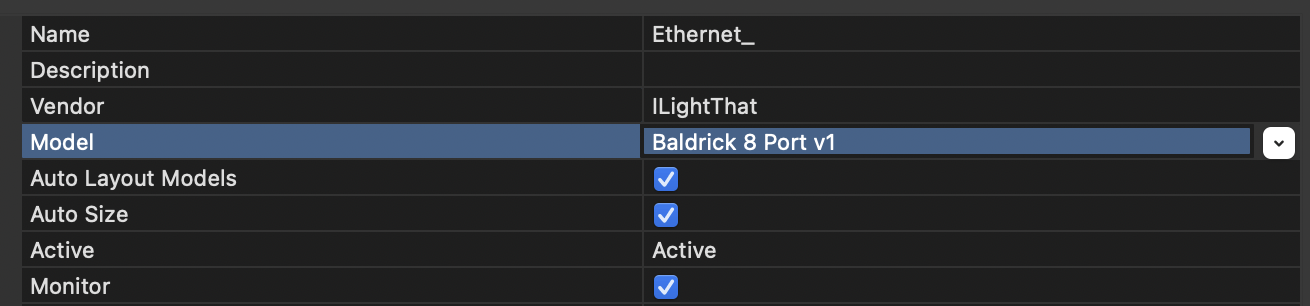
- Click strong Discover | and xLights will automagically find the Baldrick8.
- Add the board manually by selecting em ILightThat | as a vendor and em Baldrick 8 Port v1 | as the Model. You will then need to put the IP Address in manually.