BaldrickDMX
Getting Started with BaldrickDMX
Complete setup guide from power to DMX
Getting Started with BaldrickDMX
You've just got your board through the post and you are really excited about getting started! WE KNOW, We've been there. These easy to follow steps will get you started in minutes!
Safety First: Always ensure your power supply is disconnected before making any connections. Double-check all wiring before powering on.
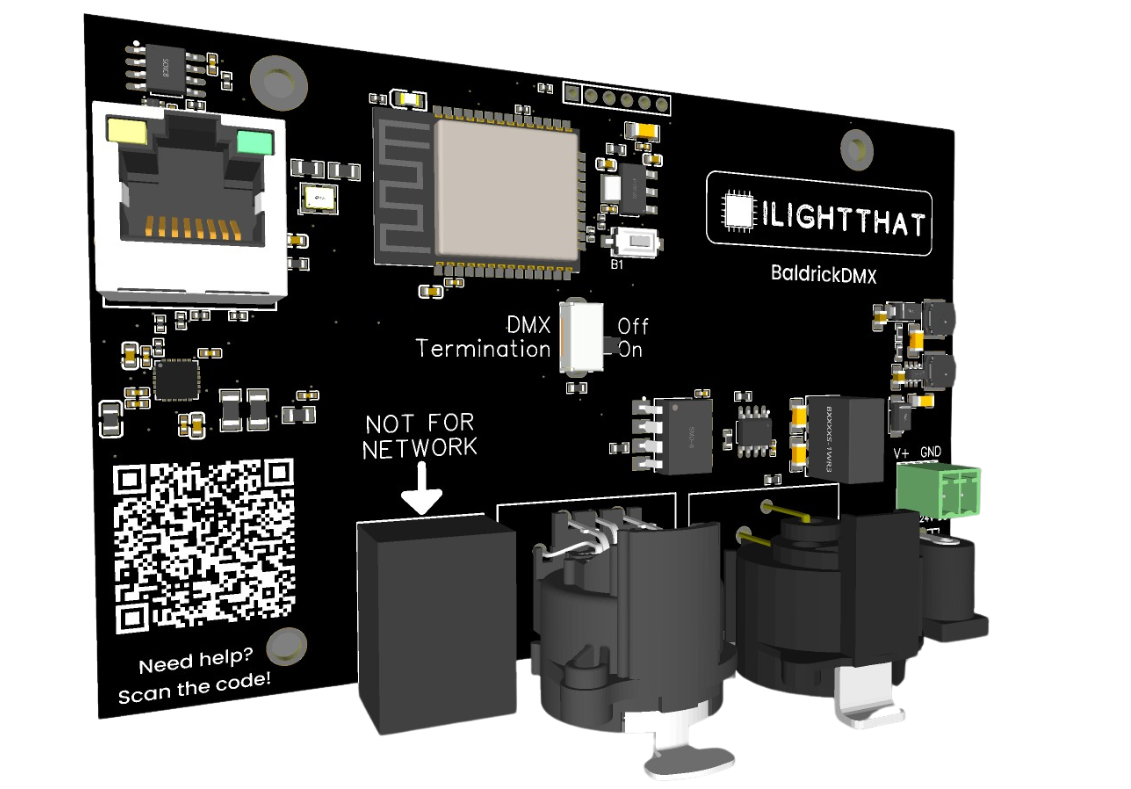
Step 1: Plugging in Your Controller
Always Use a Power Supply
WARNING: Never, ever EVER EVER plug your controller directly into the wall outlet, it will go bang and you'll have to buy another one and explain to your partner what that burn mark on the kitchen table is.
The BaldrickDMX has a barrel jack connection and a 2 port phoenix connector, these can handle voltage from 5v to 24v, which should make it easier to match whatever you are plugging in.
For technical users - barrel connector (centre positive) and we use 5.5x2.1mm barrel jacks.
Please remember you are just powering the board not the devices so we don't need a tonne of amps.
You'll notice that a British plug has three wires and our power jacks inputs only have two - that's because you need to put a power supply in between them.
We recommend the use of a variable power supply.
Step 2: Installing the Firmware
Initial Firmware Setup
When your controller arrives it will be in a 'sleeping state' - you just need to plug it into your network and head to http://baldrickdmx.local (if your DNS doesn't accept that then just look for it on your network).
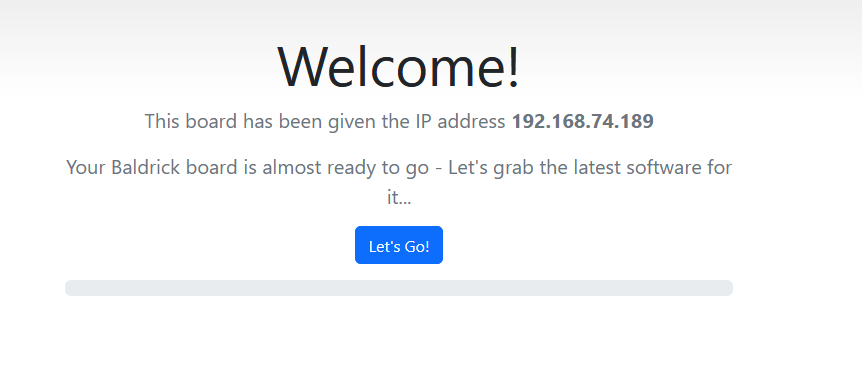
How to Install
To put it simply, press the button that says "Lets Go" then go and have a brew, the controller will connect to our server, download the latest firmware and automatically install it, once it's done the page will refresh and you can start connecting fixtures.
Tip: You must plug the board directly into your network for the initial firmware download (or make sure your computer can give it an IP address and internet access).
How Do I Update After That?
When you go to the Web interface and look at the stats section, you'll see the version number, if there is a new version, you can click that and it will automatically update in a similar interface to how this initial install works.
Step 3: Connecting Fixtures
It's Time to Connect the Fixtures
It's time to connect the fixture, choose a port:
- RJ45
- 3 PIN XLR
- 5 PIN XLR
Then take your cable and plug it in. Please don't make me have to record a video on how to do this.
They all do the same thing so don't get too excited.
Step 4: xLights Connection
Connecting with xLights
You can connect directly with xLights, look for BaldrickDMX under ilightthat.
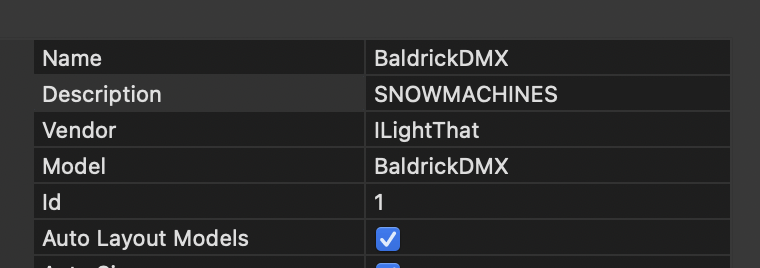
From here you can push your model settings directly to the controller and output to lights nice and easily!
You can either:
- Click strong Discover | and xLights will automagically find the BaldrickDMX.
- Add the board manually by selecting em ILightThat | as a vendor and em BaldrickDMX | as the Model. You will then need to put the IP Address in manually.