BaldrickInput1
Getting Started with BaldrickInput1
Complete setup guide from power to action
Getting Started with BaldrickInput1
Welcome to your new BaldrickInput1! This comprehensive guide will walk you through everything you need to know to get your board up and running, from plugging in power to setting up your first interactive trigger.
Safety First: Always ensure your power supply is disconnected before making any connections. Double-check all wiring before powering on.
Step 1: Powering the Board
Power Requirements
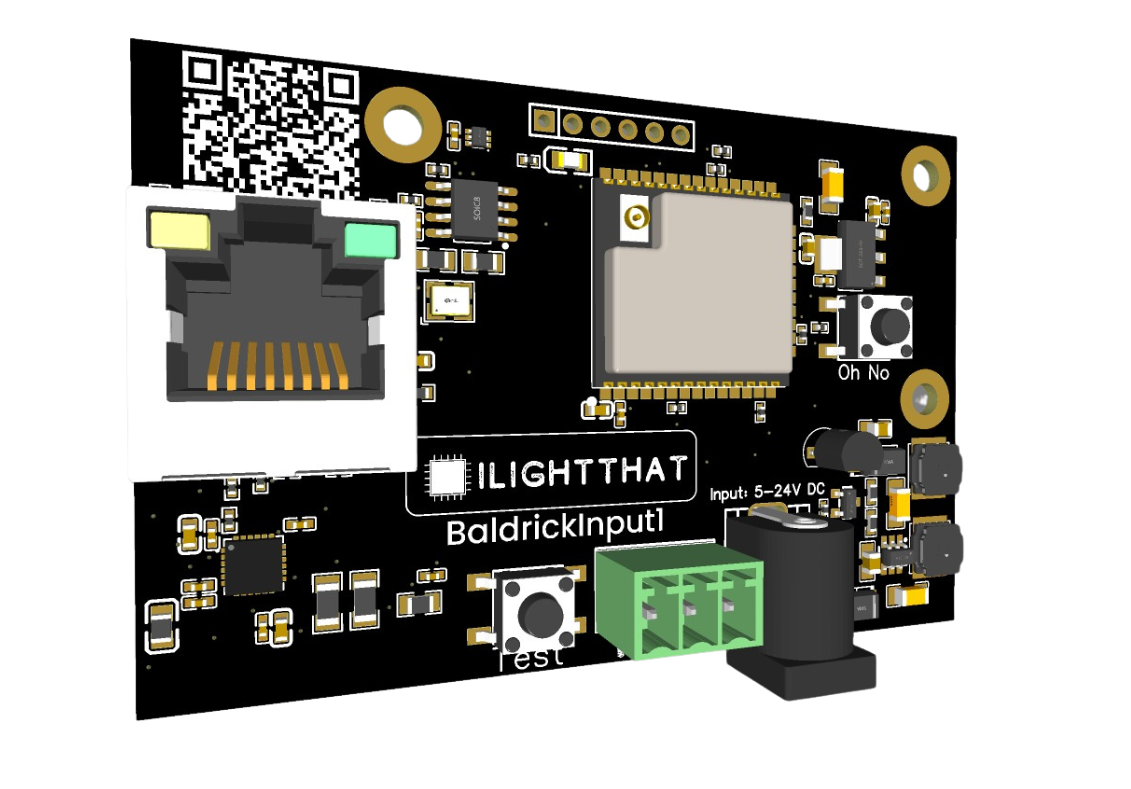
The Input1 has a Barrel Jack for power and can handle 5v-24v, whatever you use for this will be used to power the LAMP so don't choose anything too large!
The Input1 is designed to use minimal power so it's possible to run it from a USB power bank if you wish to make something portable.
Note: The voltage you choose for power will also power the lamp output, so choose an appropriate voltage for your lamp.
Step 2: Installing the Firmware
Initial Firmware Setup
When your controller arrives it will be in a 'sleeping state' - you just need to plug it into your network and head to http://baldrickinput.local (if your DNS doesn't accept that then just look for it on your network).
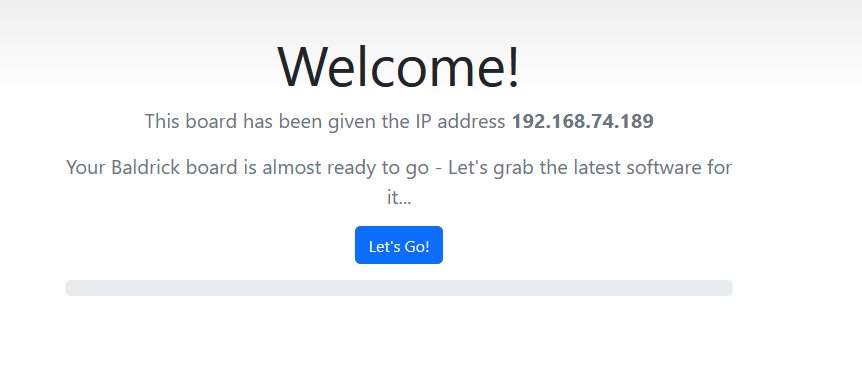
How to Install
To put it simply, press the button that says "Lets Go" then go and have a brew, the controller will connect to our server, download the latest firmware and automatically install it, once it's done the page will refresh and you can start connecting your input.
Tip: You must plug the board directly into your network for the initial firmware download (or make sure your computer can give it an IP address and internet access).
How Do I Update After That?
When you go to the Web interface and look at the stats section, you'll see the version number, if there is a new version, you can click that and it will automatically update in a similar interface to how this initial install works.
Step 3: Wire it up!
Connecting Your Input Device
It's time to wire up the input, in this example we are going to use a button but the Input1 will work with many different types of sensors.

Wiring Connections
- Lamp - This should be attached to the + side of your button LED (if not using a button with an LED this can be ignored)
- Button - This should be attached to the switch section of the button or input
- Ground button - This should be attached to the ground section of the button or input
- Ground lamp - This should be attached to the ground section of the lamp (normally we just link the ground of the button to this)
Note: The BaldrickInput1 supports various input types including buttons, motion sensors, reed switches, beam breaks, and other input devices.
Step 4: Setup the action!
Configuring Your Input Response
Now it's time to configure what happens when your input is triggered. This is where the magic happens!
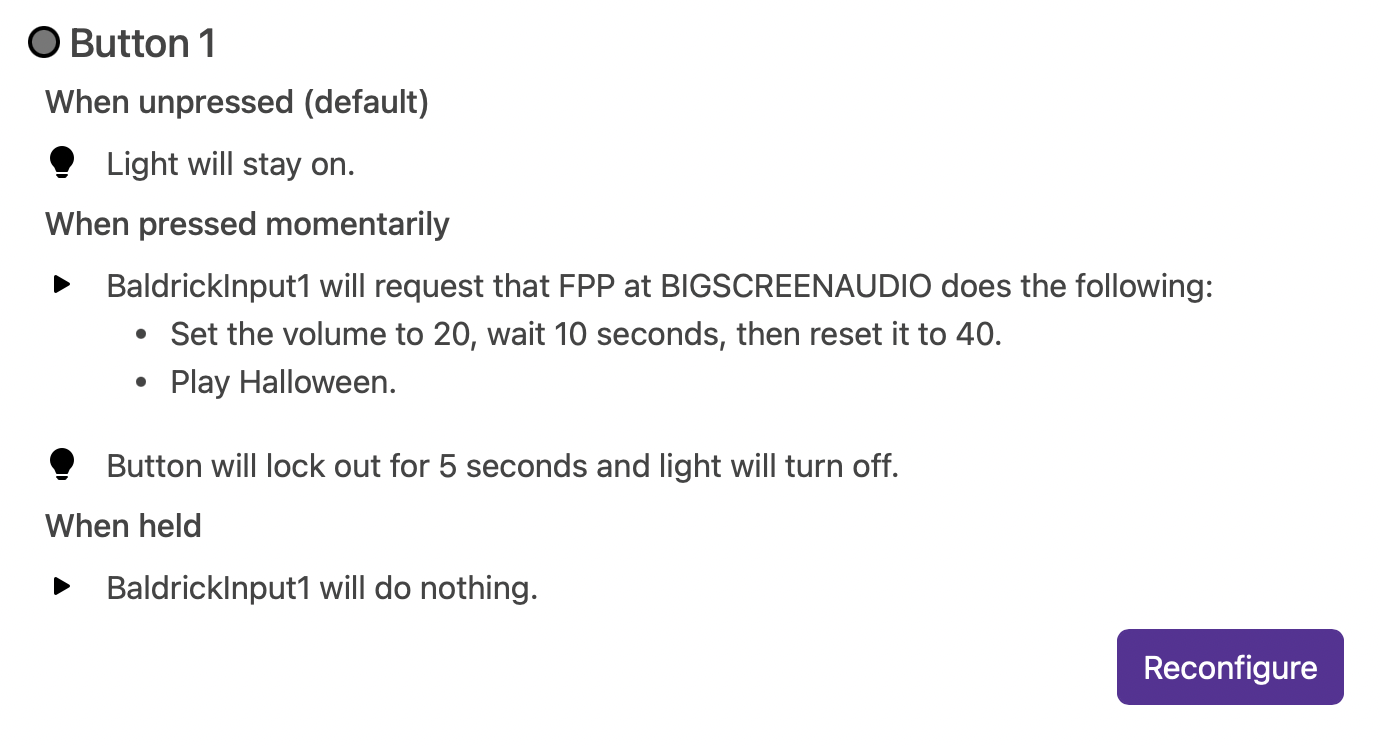
Available Actions
FPP Integration
Control FPP (Falcon Pi Player) instances, change volume, play songs/playlists, or call FPP API directly.
Toggle Test Mode
Quickly enable any test mode at a specific brightness for quick prop testing.
BaldrickSwitchy Control
Turn on/off BaldrickSwitchy ports for specific durations (bubble machines, snow machines, etc.).
BaldrickDMX Presets
Activate preset commands on your BaldrickDMX for moving heads, effects, etc.
HTTP URL Calls
Call web APIs from simple triggers - perfect for custom integrations.
Do Nothing
Sometimes you set an input to do something and think "oh actually no, that's not what I want."
Tip: The BaldrickInput1 includes lamp control capabilities, so you can also control a physical lamp or LED indicator when your input is triggered.