
BaldrickSignals Manual
Last updated 8 Sep 2026
Getting started
Getting Started with BaldrickSignals
We’re still working on this getting started guide. In the meantime, check out our web interface documentation for some configuration details. By adding /csv to the IP Address of your signals board, you’ll get a lovely CSV of all the historical data we’ve got. We’ve got a Google Sheet that you can use to visualise this data and translate it.
How to Use the Template
-
Access the Template
Click the link above to open the Google Sheets template in your browser.
-
Make a Copy
Go to File → Make a copy to create your own version of the spreadsheet.
-
Export Your Data
Navigate to your BaldrickSignals IP address with
/csvappended (e.g.,http://192.168.1.100/csv) and copy the CSV data. -
Import Your Data
Delete the information in the first two columns of the template and paste your CSV data.
-
View Your Graphs
The Graph page will now show you a pretty graph of your signals data.
Eventually this should update automatically but we are not there yet!
Technical specifications
At a glance
Board components
<nav>
  <button class="manual-tab active" type="button" data-action="click->tabs#switch" data-tab="v1-1">BaldrickSignals v1.1</button>
  <button class="manual-tab" type="button" data-action="click->tabs#switch" data-tab="v1-0">BaldrickSignals v1.0</button>
</nav>
<div class="tab-panel" data-tab="v1-1">
  <div class="figure">
    <div class="fimg">
      <img src="baldricksignals/breakdown11.png" alt="BaldrickSignals v1.1 Board Overview" class="doc-img">
    </div>
  </div>
  <ul>
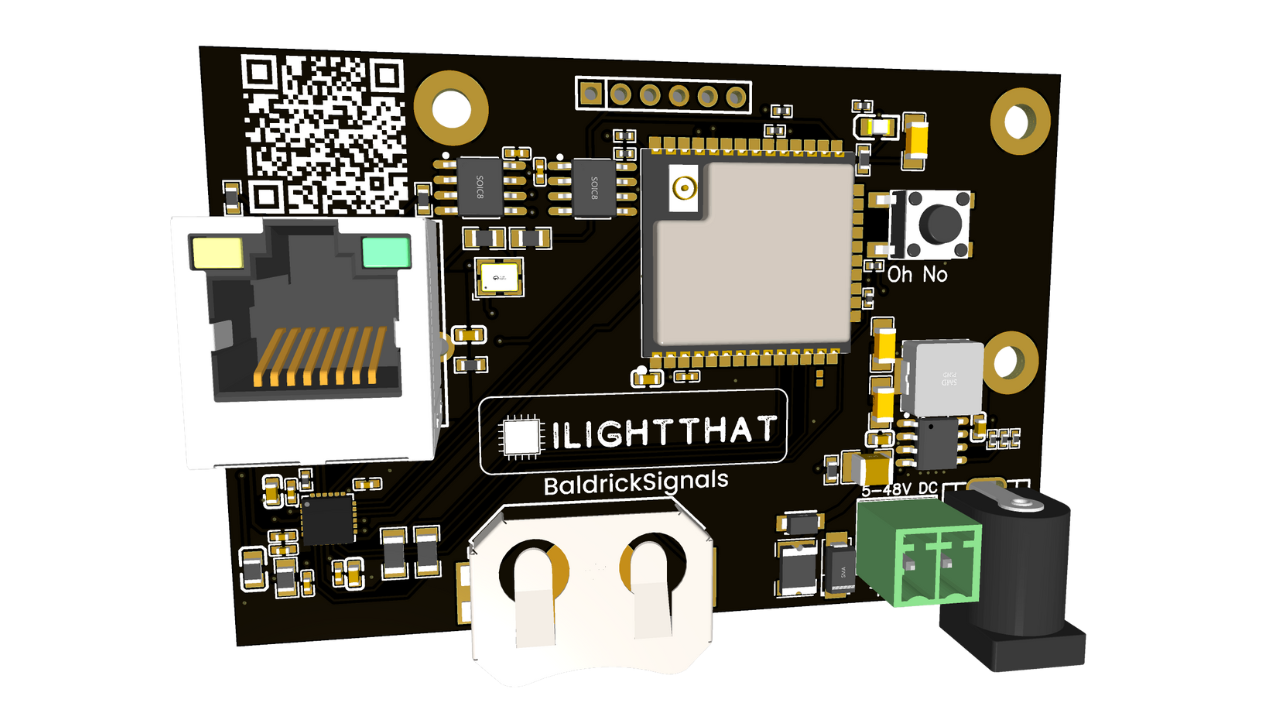
    <li><strong>1. Power Jack —</strong> You can put 5v-48v through a barrel connector (centre positive) and we use 5.5x2.1mm barrel jacks.</li>
    <li><strong>2. 2 Pin Pheonix Connector —</strong> You can put 5v-48v through this connector.</li>
    <li><strong>3. CR2032 Coin cell clip —</strong> Using this will allow the BaldrickSignals to keep the time even when the board is disconnected from the network (this will not power the board). Your vendor will probably not supply this so make sure you've got one.</li>
    <li><strong>4. Wireless Chip —</strong> The BaldrickSignals uses wifi to detect other devices, you'll need an <a href="/faq#antennas">antenna</a>.</li>
    <li><strong>5. 100mb Ethernet Port —</strong> You can use this to connect to your show network.</li>
    <li><strong>6. QR Code —</strong> An easy to scan QR code which will take you to these docs for easy troubleshooting.</li>
    <li><strong>7. Oh No button —</strong> Use this to reset the board by holding for 5 seconds when the board is booting.</li>
  </ul>
</div>
<div class="tab-panel hidden" data-tab="v1-0">
  <div class="figure">
    <div class="fimg">
      <img src="baldricksignals/breakdown.png" alt="BaldrickSignals v1.0 Board Overview" class="doc-img">
    </div>
  </div>
  <ol>
    <li><strong>Power Jack —</strong> Can take 5v to 24v (each side can take different voltages) and will automatically step down to power the components, no jumpers needed. <strong>Whatever voltage you used here is also used to power the lamp</strong>.</li>
    <li><strong>CR2032 Coin cell clip —</strong> Using this will allow the BaldrickSignals to keep the time even when the board is disconnected from the network (this will not power the board). Your vendor will probably not supply this so make sure you've got one.</li>
    <li><strong>Wireless Chip —</strong> The BaldrickSignals uses wifi to detect other devices, you'll need an <a href="/faq#antennas">antenna</a>.</li>
    <li><strong>100mb Ethernet Port —</strong> You can use this to connect to your show network.</li>
    <li><strong>QR Code —</strong> An easy to scan QR code which will take you to these docs for easy troubleshooting.</li>
    <li><strong>Oh No button —</strong> Use this to reset the board by holding for 5 seconds when the board is booting.</li>
  </ol>
</div>
Web interface
The web interface has been designed to be as simple as possible
Stats Dashboard
System Information
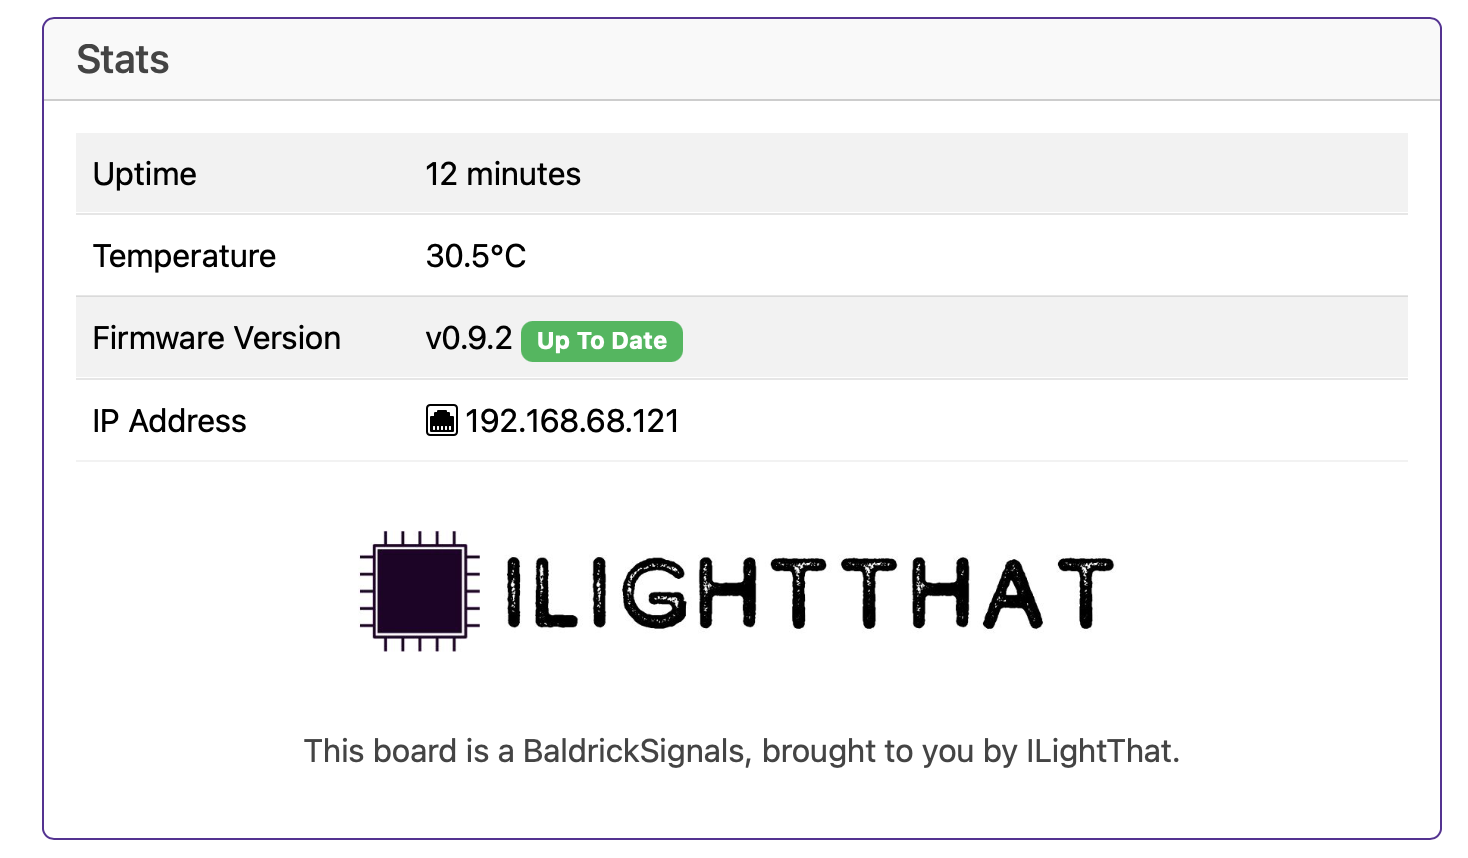
The Stats board gives you a heads up as to what’s going on with your controller.
Uptime
Tells you how long your controller has been powered on (this is useful in June to remind you that you forgot to turn it off over christmas)
Temperature
With a sensor next to the Ethernet connector, this gives you an indication of the board temperature (in Celsius because water freezes at 0, not 32.. how does that make sense?)
Generally, PCBs and components are good for -40 to +85°C. Anything below 60°C on this board is fine and nothing to worry about. If the temp is above that, try blowing on it like you would a hot chip out of the oven.
Firmware Version
This will let you know your current version and if there is a version to upgrade to.
(clicking the new version will upgrade it in place then restart the controller)
IP Address
It would be pretty silly to have a controller information box without showing you the IP Address of the controller wouldn’t it? That would be like launching a controller without being able to manage the networking.
Crowd Monitoring
Crowd Detection
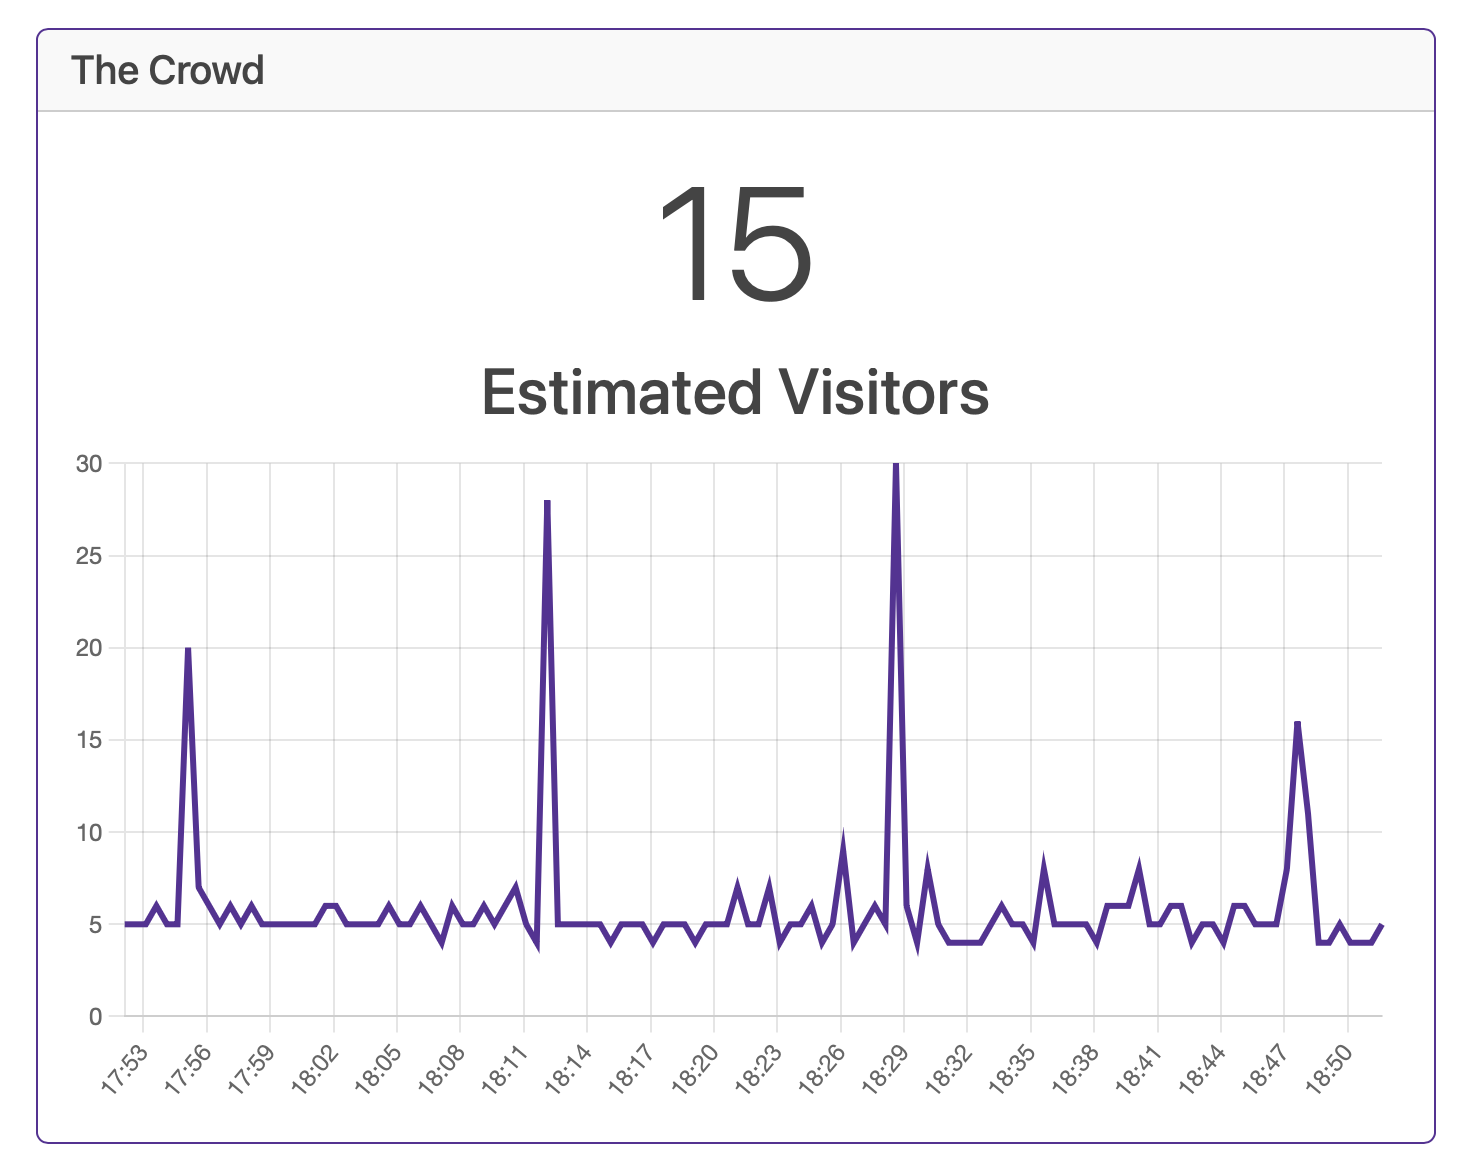
Now we get to the good stuff. Every 30 seconds we will poll the universe (or at least as far as the antenna will detect).
Network Configuration
Good Defaults, Easy Config
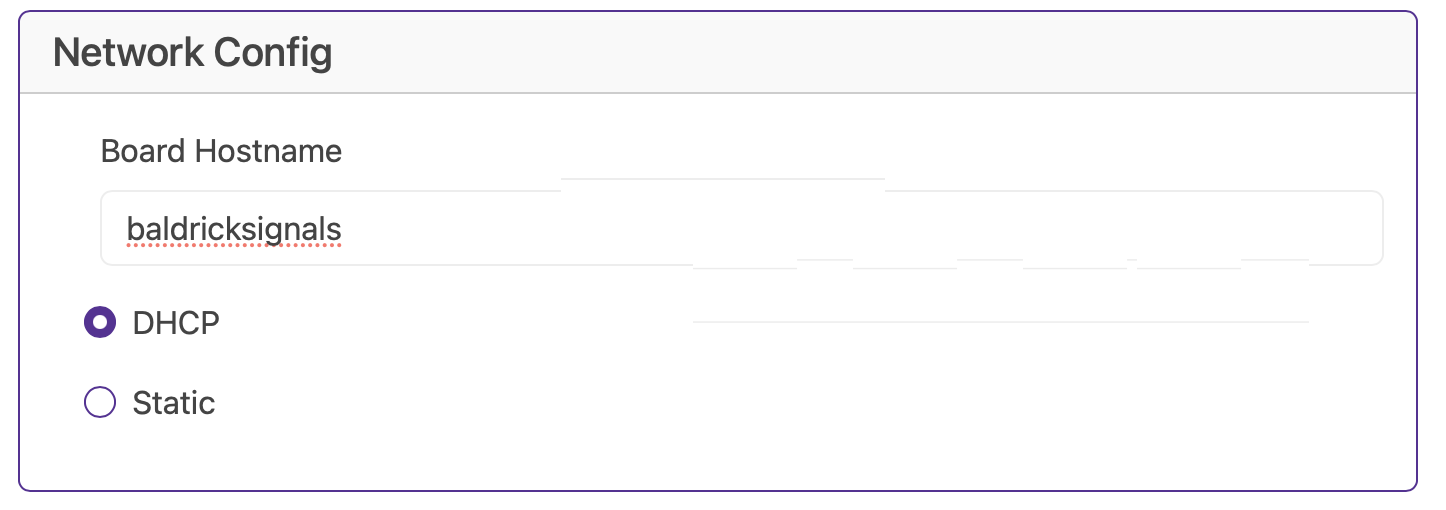
Hostname
The default hostname is baldrickboard (hence baldrickboard.local). If you have one Baldrick8 then it’s completely fine to keep this as it is, however if like us you want to collect a few of them, then we’d recommend you change this to something like frontgarden or upstairsroof
(Just a reminder that hostnames should be lowercase without spaces)
DHCP / STATIC
The default option is DHCP (which is Dynamic Host Configuration Protocol but you don’t need to know that) which basically means your router or computer gives the board an I.P. address. This is great for initial setup but when you want to run a show it’s best to switch it to STATIC, that’s where your controller tells the router / computer “This is my IP”.
IP Address
Set this to the IP address that you want the controller to be fixed to.
Subnet Mask & Gateway
It is more than likely that you can copy the Subnet Mask (the size of your network) and the Default Gateway (the exit point of your network) from the output of an IPconfig check.
DNS Server
DNS wise, typically, your default gateway is your router IP, and that more often than not, can provide your network with DNS. However, some people like to use “outside 3rd parties” DNS like google or cloudflares DNS. If you don’t know about this, its probably best just to stick to DHCP.
The Turnip Network
Network Discovery
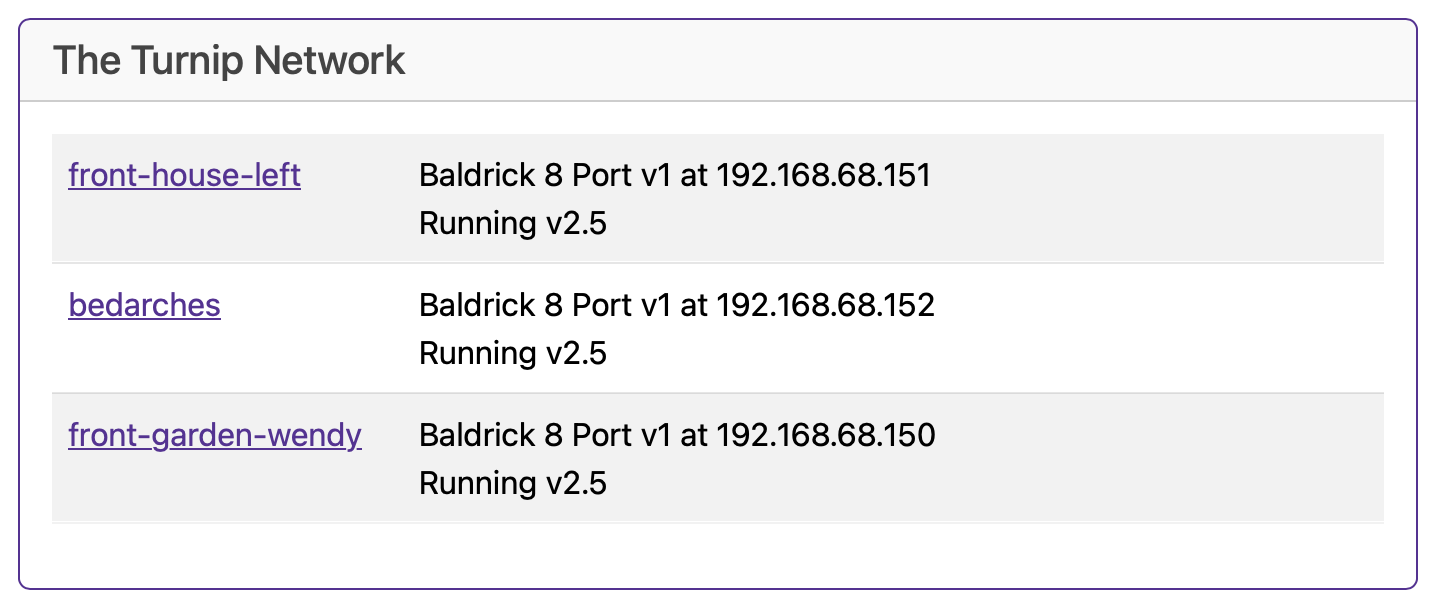
The Baldrick Boards will keep an eye out on the network for other Baldricks and let you know how they are doing (this is helpful as we don’t put an LCD screen on the board).
You can directly jump to their control panel from this interface and when they appear in this list, more board functionality will become available.
Advanced Settings
Advanced Configuration Options
Enable Beta Updates
Sometimes we put updates out that aren’t quite ready for prime time (or in the case of a Seasonal Freeze, it’s an update which isn’t critical).
Permanent Device Offset
At this current state of development and to comply with all data protection and GDPR laws, Signals gives you a static number of the devices detected. In many cases there will be devices detected which are present all the time (such as your phone). You can offset this by putting a number in this box (the number will never go below zero!).
Crowd Multiplier
Depending on your audience type, you might find that your audience isn’t quite representative of the number of mobile devices detected (if you have a lot of young children visiting with parents you might find it vastly under counts). You can offset this by putting a multiplier in this box (the base number minus the offset will be multiplied by this amount).