
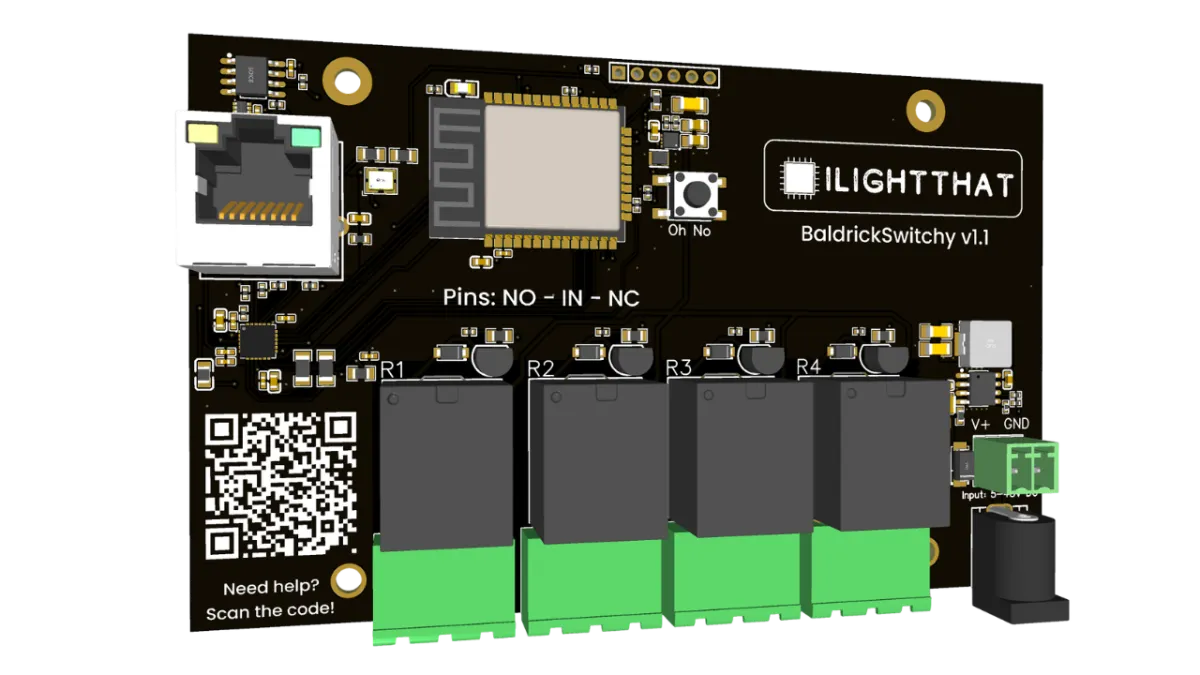
BaldrickSwitchy Manual
Last updated 25 Oct 2026
Getting started
You’ve just got your board through the post and you are really excited about getting started! WE KNOW, We’ve been there. These easy to follow steps will get you started in minutes!
1. Power Connection
Plugging in your controller
The BaldrickSwitchy has a barrel jack connection and can handle voltage from 5v to 24v (5v to 48v on version 1.1), this is to make it easier to match whatever you are plugging in.
For technical users - barrel connector (centre positive) and we use 5.5x2.1mm barrel jacks.
Please remember you are just powering the board not the devices.
Never, ever EVER EVER EVER plug your controller directly into the wall outlet, it will go bang and you’ll have to buy another one and explain to your partner what that burn mark on the kitchen table is.
You’ll notice that a British plug has three wires and our power jacks inputs only have two that’s because you need to put a power supply in between them.
We recommend the use of a variable power supply.
2. Installing Firmware
Installing the firmware
When your controller arrives it will be in a ‘sleeping state’ you just need to plug it into your network and head to http://baldrickswitchy.local (if your DNS doesn’t accept that then just look for it on your network)
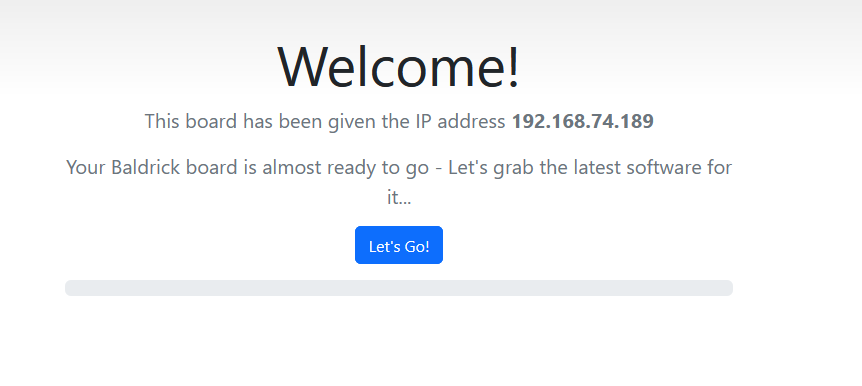
How to install
To put it simply, press the button that says Lets Go then go and have a brew, the controller will connect to our server, download the latest firmware and automatically install it, once it’s done the page will refresh and you can start connecting devices.
It’s not working?
You must plug the board directly into your network for the initial firmware download (or make sure your computer can give it an IP address and internet access).
How do I update after that?
When you go to the Web interface and look at the stats section, you’ll see the version number, if there is a new version, you can click that and it will automatically update in a similar interface to how this initial install works.
3. Connecting Devices
Connecting Devices
The BaldrickySwitchy is pretty much exactly as it says in its name - It is a switch (or a set of switches!). It doesn’t provide power, it doesn’t change voltages, it doesn’t dim - It switches.
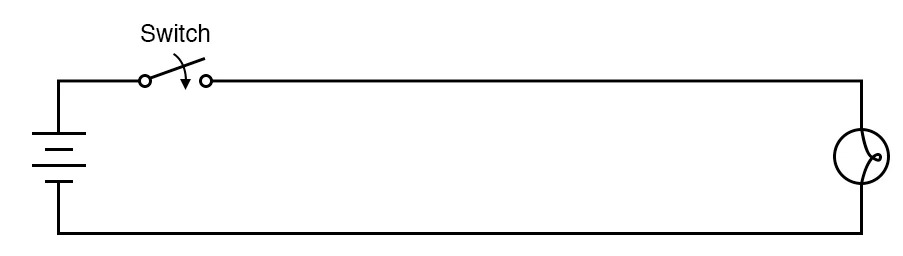
A Switch makes or breaks a circuit, as seen in this picture:
So with this in mind, it would be impossible for us to list all the ways that you can connect devices but a very simple way of quickly integrating the BaldrickSwitchy is:
You can take a wire, cut it, and put each side of the cut wire into one of connectors then use BaldrickSwitchy to make the wire complete again when it is activated (BaldrickSwitchy leaves the circuit open/broken at rest, and closes/makes the circuit when activated).
That wire you cut could be:
- A live wire in a cable feeding a string of mains powered lights
- The power wire going into a “dumb” snow/smoke/bubble machine
- A 0v signal or control wire on a device that has a “button to activate”
Here are two example images of integration of the Relay connector one with a USB powered device and the negative line cut:
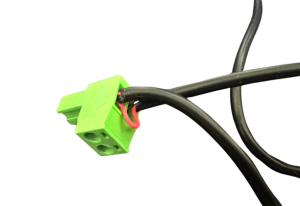
One with a mains powered device and both lines cut and the live connected via a WAGO:
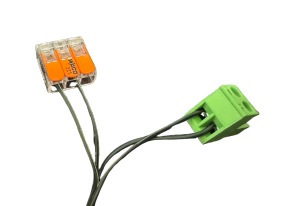
If you are planning to connect something powerful like a snowmachine, make sure that it will not draw more than 8amps of power (at 240v, that is about 2000w, or at 100v for the US folk, it is about 800w), as the relays on baldrick may get hot, melt or get stuck closed if you pull too much current (thats bad news!).
It’s time to connect a device, now I don’t need to say it but I will..
BE CAREFUL, DO NOT DO ANY OF THIS WITH ANYTHING PLUGGED IN AND DO NOT REMOVE THE DARWINTRAY
4. xLights Setup
xLights Setup
Automatic Detection
You can connect directly with xLights, look for BaldrickSwitchy under ILightThat.
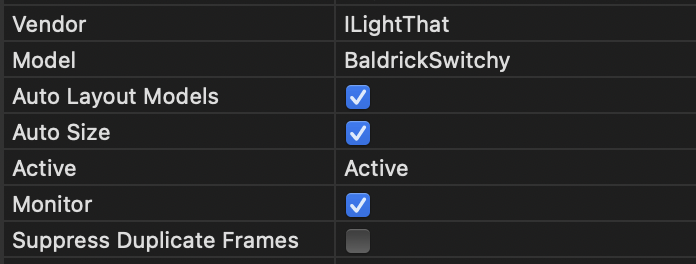
From here you can push your model settings directly to the controller and output to lights nice and easily!
Manual Addition
You can either:
- Click Discover and xLights will automagically find the BaldrickSwitchy.
- Add the board manually by selecting ILightThat as a vendor and BaldrickSwitchy as the Model. You will then need to put the IP Address in manually
xLights Visualizer
The BaldrickSwitchy will have four ports in xLights, surprisingly each one correlates to a relay on the board.
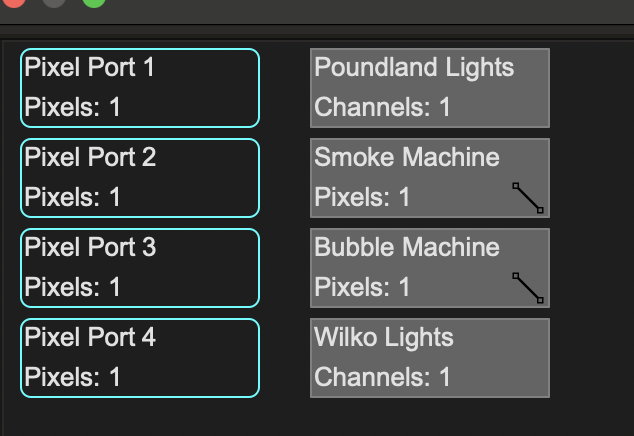
Layout Settings
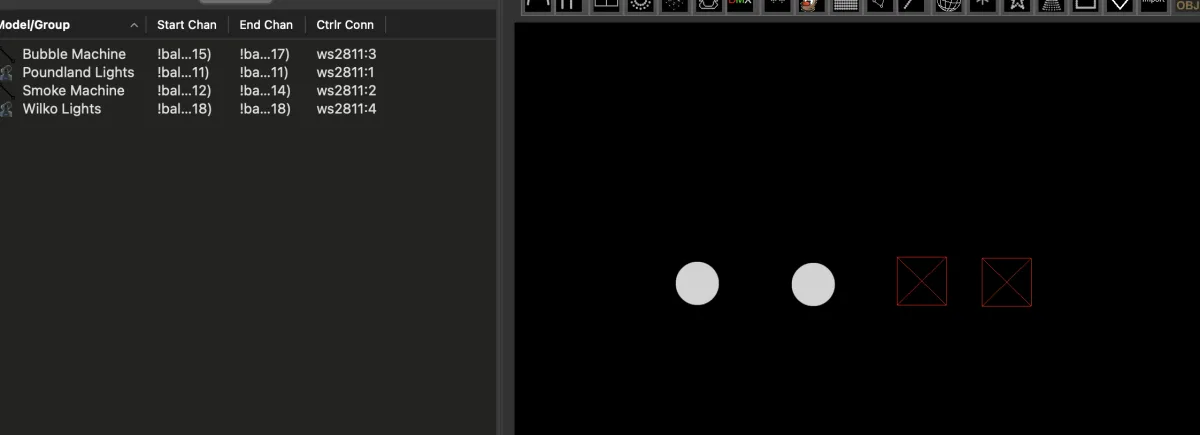
There are two simple ways to add a device to xLights in the layout, you can either add it as a single pixel or a single channel DMX Prop (we recommend DMX over Pixel to avoid confusion later on).
Sequencing BaldrickSwitchy
Sequencing BaldrickSwitchy couldn’t be easier, you just turn it on! Oh sure there are fancy things you can do by having it on and off in sequence but at the very basic level, turn it on then turn it off.
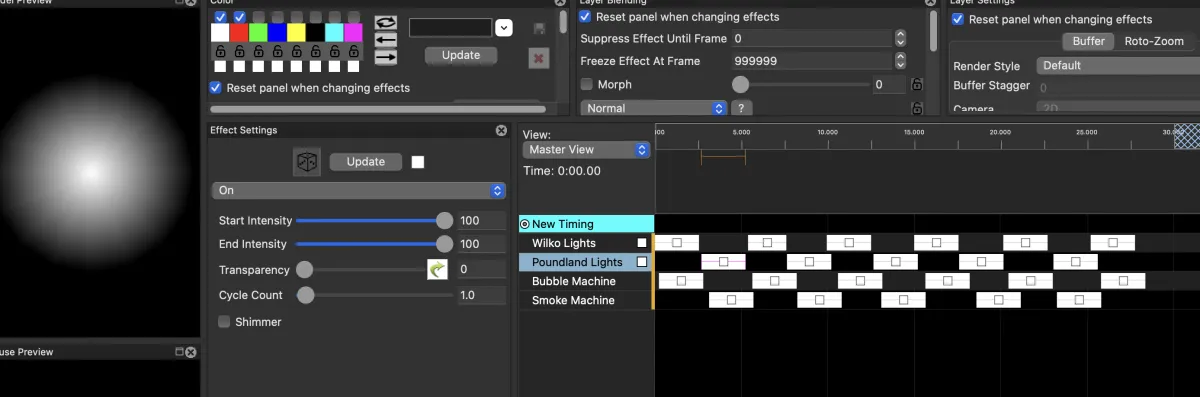
Technical specifications
At a glance
Board components
<nav>
  <button class="manual-tab active" type="button" data-action="click->tabs#switch" data-tab="v1-1">BaldrickSwitchy v1.1</button>
  <button class="manual-tab" type="button" data-action="click->tabs#switch" data-tab="v1-0">BaldrickSwitchy v1.0</button>
</nav>
<div class="tab-panel" data-tab="v1-1">
  <div class="figure">
    <div class="fimg">
      <img src="baldrickswitchy/breakdown11.png" alt="BaldrickSwitchy v1.1 Board Overview" class="doc-img">
    </div>
  </div>
  <ul>
    <li><strong>1. Power Jack —</strong> You can put 5v-48v through a barrel connector (centre positive) and we use 5.5x2.1mm barrel jacks. Please remember you are just powering the board not the devices.</li>
    <li><strong>2. 2 Pin Pheonix Connector —</strong> You can put 5v-48v through this connector. Please remember you are just powering the board not the devices.</li>
    <li><strong>3. 3 Pin Relays —</strong> Connect your device to enable control via the BaldrickSwitchy.</li>
    <li><strong>4. QR Code —</strong> An easy to scan QR code which will take you to these docs for quick troubleshooting.</li>
    <li><strong>5. Ethernet port —</strong> To ensure the consistent connection to your devices, we've added a 100mb ethernet port to connect to your show network.</li>
    <li><strong>6. Oh No Button —</strong> Did you break our board? Press and hold this for 10 seconds on boot to reset to factory settings.</li>
    <li><strong>7. Mounting Holes —</strong> The BaldrickSwitchy is classed as a medium family member.</li>
  </ul>
  <div class="callout warn">
    <svg class="ci" viewBox="0 0 24 24" fill="none" stroke="currentColor" stroke-width="1.8"><path d="M12 9v4m0 4h.01M10.3 3.6 2.6 17a2 2 0 0 0 1.7 3h15.4a2 2 0 0 0 1.7-3L13.7 3.6a2 2 0 0 0-3.4 0z"/></svg>
    <div><b>Mounting holes</b> DO NOT DRILL out these holes to make them fit the screws you've got already, doing this will void any warranty.</div>
  </div>
  <div class="callout info">
    <svg class="ci" viewBox="0 0 24 24" fill="none" stroke="currentColor" stroke-width="1.8"><path d="M12 16v-4m0-4h.01M22 12a10 10 0 1 1-20 0 10 10 0 0 1 20 0z"/></svg>
    <div><b>Note</b> The board will also come affixed to a <a href="/boards/baldrickswitchy/faq#darwin-tray">Darwin Tray</a> for your protection.</div>
  </div>
</div>
<div class="tab-panel hidden" data-tab="v1-0">
  <div class="figure">
    <div class="fimg">
      <img src="baldrickswitchy/breakdown.png" alt="BaldrickSwitchy v1.0 Board Overview" class="doc-img">
    </div>
  </div>
  <ol>
    <li><strong>Power Jack —</strong> You can put 5v-24v through a barrel connector (centre positive) and we use 5.5x2.1mm barrel jacks. Please remember you are just powering the board not the devices.</li>
    <li><strong>Relay 1 —</strong> Connect your device to enable control via the BaldrickSwitchy.</li>
    <li><strong>Relay 2 —</strong> Connect your device to enable control via the BaldrickSwitchy.</li>
    <li><strong>Relay 3 —</strong> Connect your device to enable control via the BaldrickSwitchy.</li>
    <li><strong>Relay 4 —</strong> Connect your device to enable control via the BaldrickSwitchy.</li>
    <li><strong>QR Code —</strong> An easy to scan QR code which will take you to these docs for quick troubleshooting.</li>
    <li><strong>Ethernet port —</strong> To ensure the consistent connection to your devices, we've added a 100mb ethernet port to connect to your show network.</li>
    <li><strong>ESP32 —</strong> The brains of our board, don't worry about this too much, that's our job, not yours.</li>
    <li><strong>Company logo —</strong> Our company logo, isn't it great?</li>
    <li><strong>Mounting Holes —</strong> We've designed the BaldrickSwitchy to not only be as compact as possible, we've matched the mounting holes to other common controllers so mounts can be reused (in this case the Falcon SRX2 Receiver).</li>
  </ol>
  <div class="callout warn">
    <svg class="ci" viewBox="0 0 24 24" fill="none" stroke="currentColor" stroke-width="1.8"><path d="M12 9v4m0 4h.01M10.3 3.6 2.6 17a2 2 0 0 0 1.7 3h15.4a2 2 0 0 0 1.7-3L13.7 3.6a2 2 0 0 0-3.4 0z"/></svg>
    <div><b>Mounting holes</b> DO NOT DRILL out these holes to make them fit the screws you've got already, doing this will void any warranty.</div>
  </div>
  <div class="callout info">
    <svg class="ci" viewBox="0 0 24 24" fill="none" stroke="currentColor" stroke-width="1.8"><path d="M12 16v-4m0-4h.01M22 12a10 10 0 1 1-20 0 10 10 0 0 1 20 0z"/></svg>
    <div><b>Note</b> The board will also come affixed to a <a href="/boards/baldrickswitchy/faq#darwin-tray">Darwin Tray</a> for your protection.</div>
  </div>
</div>
Web interface
The web interface has been designed to be as simple as possible
Stats Dashboard
System Information
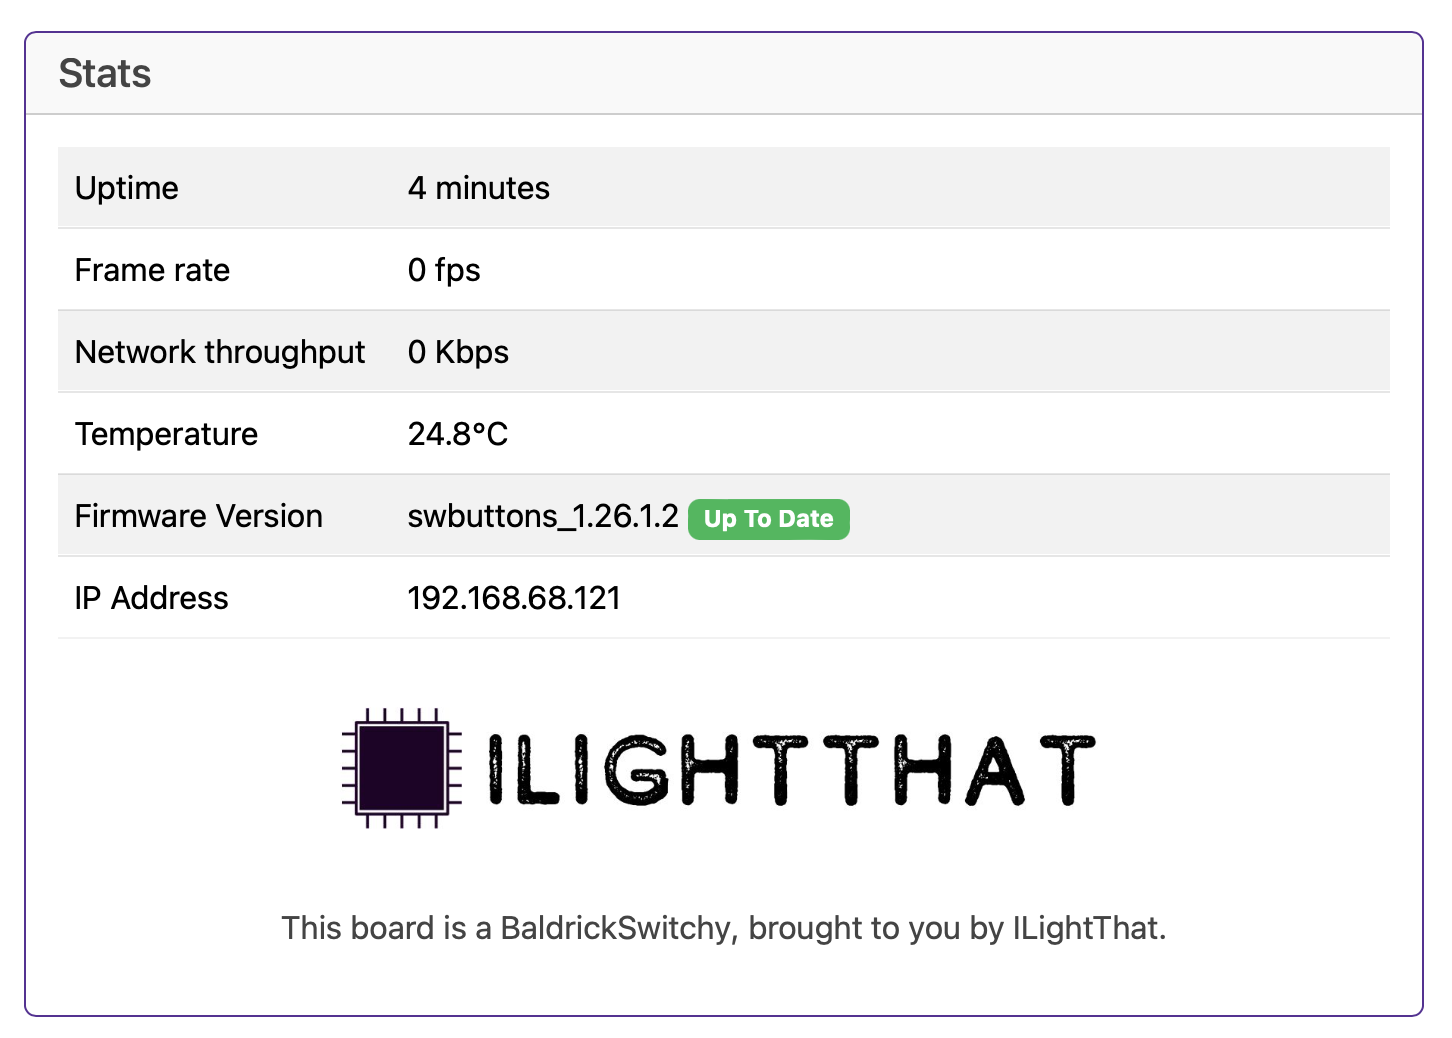
The Stats board gives you a heads up as to what’s going on with your controller.
Uptime
Tells you how long your controller has been powered on (this is useful in June to remind you that you forgot to turn it off over christmas)
Frame Rate
This lets you know what FPS (Frames Per Second) the controller is currently outputting (Why would I need this for a relay board you may ask, and we will let you keep guessing)
Network Throughput
Like the FPS, this gives you an indication of the volume of network traffic passing through the controller, this should help with debugging.
Temperature
With a sensor next to the Ethernet connector, this gives you an indication of the board temperature (in Celsius because water freezes at 0, not 32.. how does that make sense?)
Generally, PCBs and components are good for -40 to +85°C. Anything below 60°C on this board is fine and nothing to worry about. If the temp is above that, try blowing on it like you would a hot chip out of the oven.
Firmware Version
Let’s you know what version firmware your BaldrickSwitchy is currently running.
(clicking the new version will upgrade it in place then restart the controller)
IP Address
Tells you the current IP address of the Baldrick Switchy.
Test Mode
Quick Testing & Troubleshooting
Test mode is one of the most important features of the Baldrick Board. If it’s two hours before switch on and something is going wrong, YOU NEED CLEAR INFORMATION QUICKLY.
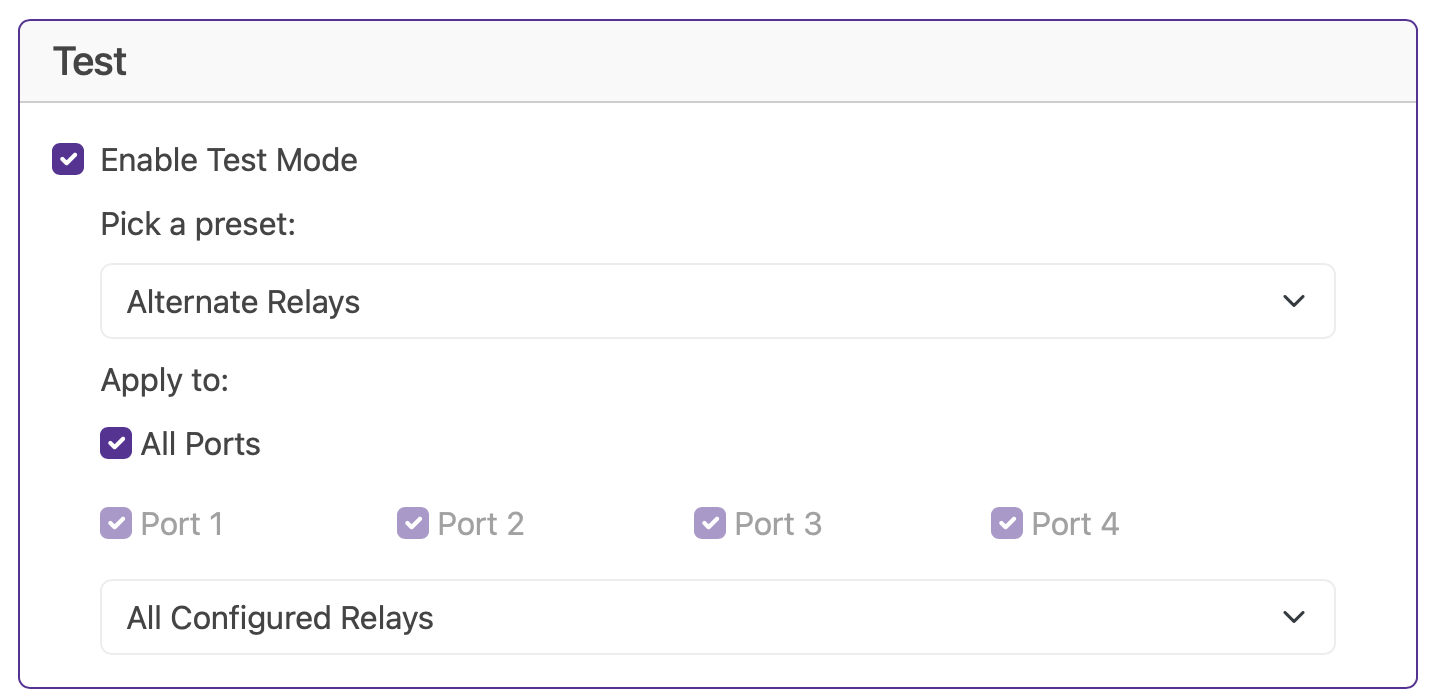
Presets
At the moment we only have one preset, Alternate Relay which alternates between on and off every second, but you can see we’ve made that Presets box into a dropdown as we know we’ll think of some later.
Apply to
Select your port (or all ports) you’d like the effect applied to.
Relay Configuration
Manual Relay Setup
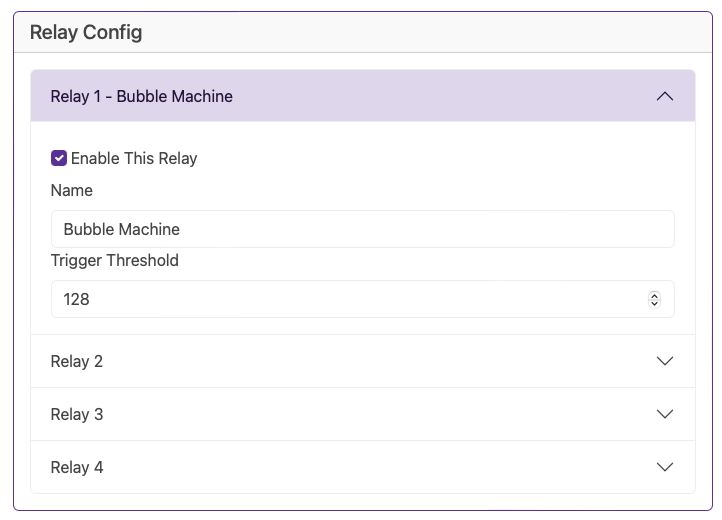
Whilst we expect much of the configuration to be pushed from xLights, you can directly add your devices to the BaldrickSwitchy from this section.
It’s a simple interface with only a name and a trigger threshold.
Networking Configuration
Good Defaults, Easy Config
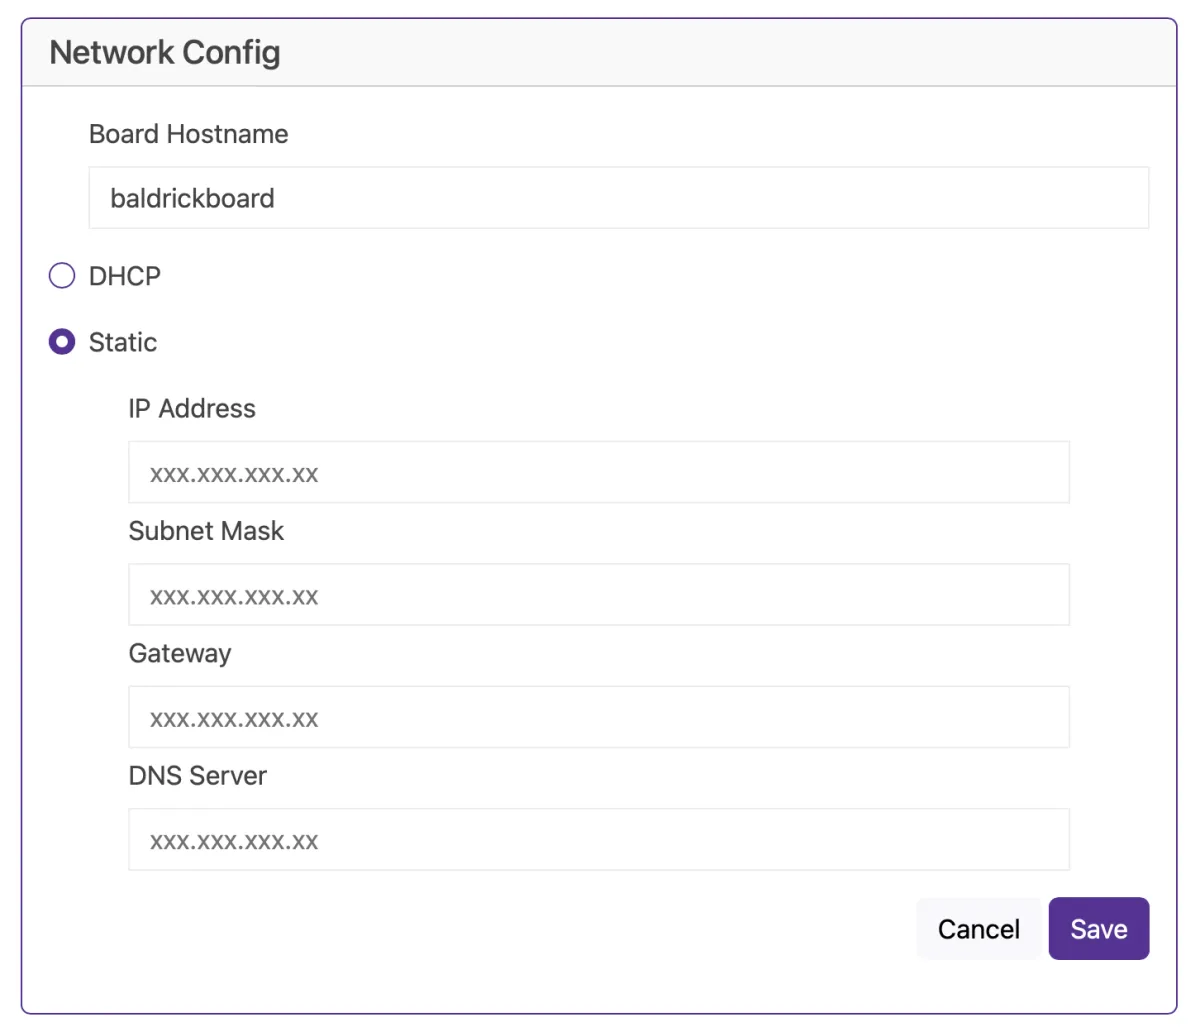
Hostname
The default hostname is baldrickswitchy (hence baldrickswitchy.local). If you have one BaldrickSwitchy then it’s completely fine to keep this as it is, however if like us you want to collect a few of them, then we’d recommend you change this to something like frontgarden or upstairsroof
(Just a reminder that hostnames should be lowercase without spaces)
DHCP / STATIC
The default option is DHCP (which is Dynamic Host Configuration Protocol but you don’t need to know that) which basically means your router or computer gives the board an I.P. address. This is great for initial setup but when you want to run a show it’s best to switch it to STATIC, that’s where your controller tells the router / computer “This is my IP”.
IP Address
Set this to the IP address that you want the controller to be fixed to.
Subnet Mask & Gateway
It is more than likely that you can copy the Subnet Mask (the size of your network) and the Default Gateway (the exit point of your network) from the output of an IPconfig check.
DNS Server
DNS wise, typically, your default gateway is your router IP, and that more often than not, can provide your network with DNS. However, some people like to use “outside 3rd parties” DNS like google or cloudflares DNS. If you don’t know about this, its probably best just to stick to DHCP.
The Turnip Network
Network Discovery
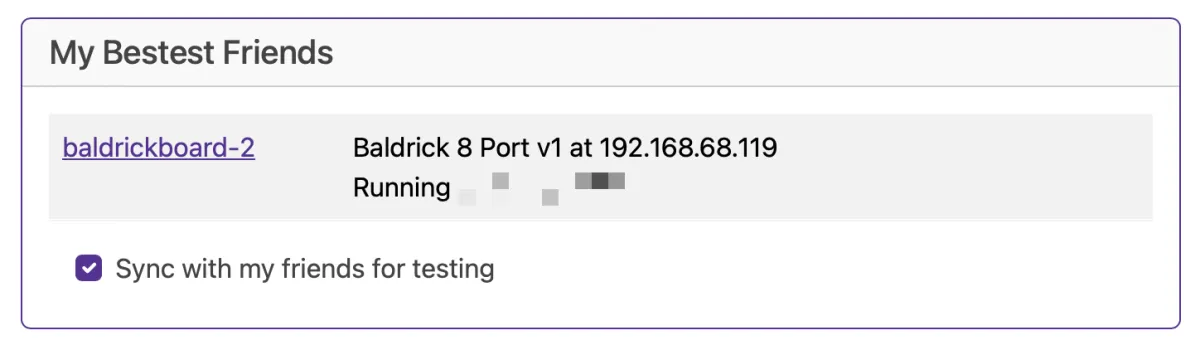
The Baldrick Boards will keep an eye out on the network for other Baldricks and let you know how they are doing (this is helpful as we don’t put an LCD screen on the board).
You can directly jump to their control panel from this interface and when they appear in this list, more board functionality will become available.
Data Settings
Protocol Configuration
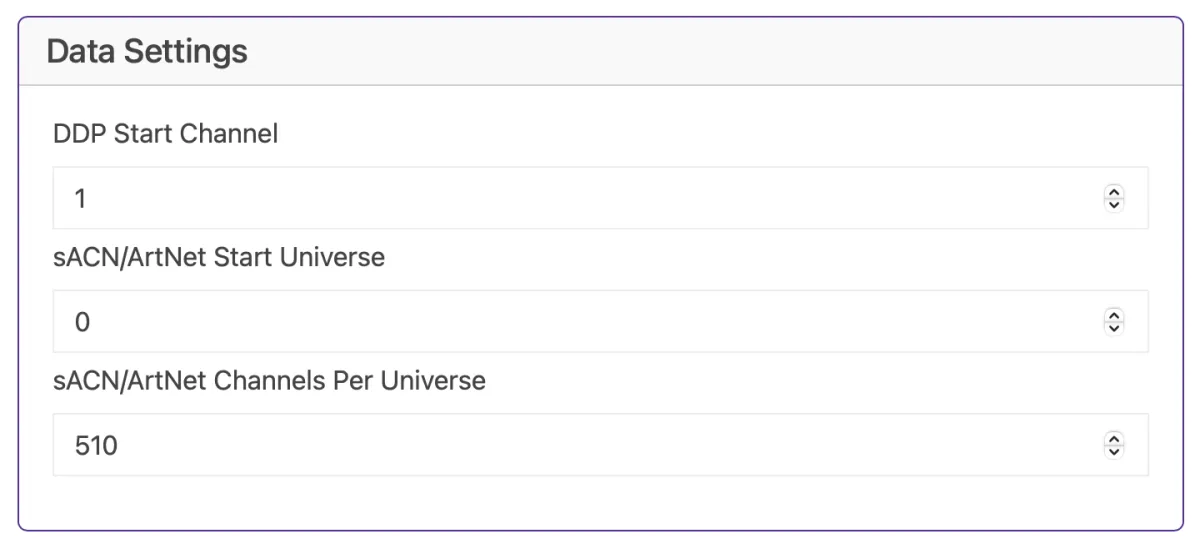
DDP Start Channel
Configure the starting channel for DDP (Distributed Display Protocol) communication.
sACN/ArtNet Start Universe
Set the starting universe for sACN (Streaming ACN) and ArtNet protocols.
sACN/ArtNet Channels Per Universe
Configure how many channels are used per universe for sACN and ArtNet protocols.